Still no Scotland photos processed yet, but we've had some nice weather lately so I've been out and about a bit locally, taking some panoramas.
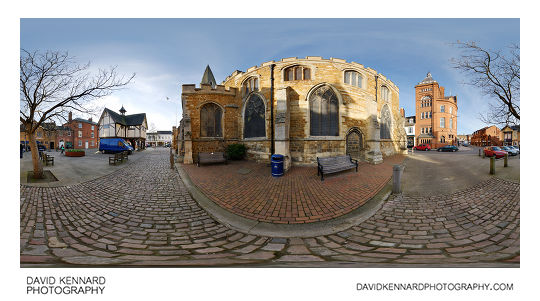
Above is the Church, St. Dionysius, which is in the centre of Market Harborough. Nearby you can see the old red brick building, which is the only remaining part of Symington's Corset factory. The factory used to be quite large, now the building is used for council offices, the library, and museum. You can see the VR version here: Church Square, Market Harborough 360 VR.
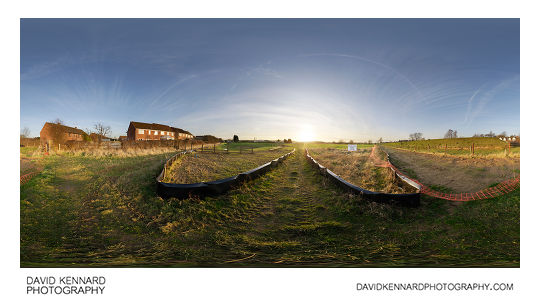
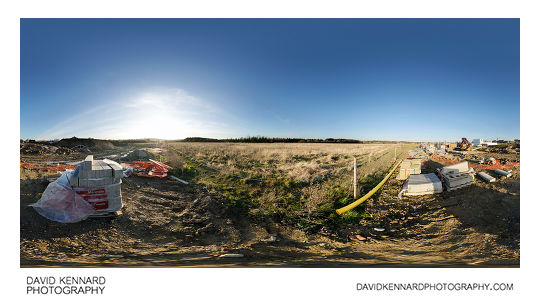
I have taken quite a few panos of Farndon Fields over the last week or so. The area is under development at the moment, so I am trying to take various panos as the development progresses. The 360VR version can be viewed at Farndon Fields Jan 2012 (I) 360 VR.
After taking the pano above I thought I was going to get a nice sunset with the sun shining through the thin cloud around the horizon, and lighting the cloud up orange. Unfortunately the cloud just seemed to diffuse the sunlight, removing shadows, without going orange.
Personally, I generally prefer my landscapes bathed in sunlight, so instead I walked around a field really slowly for about an hour, hoping that sometime after the sun had set the situation would improve.
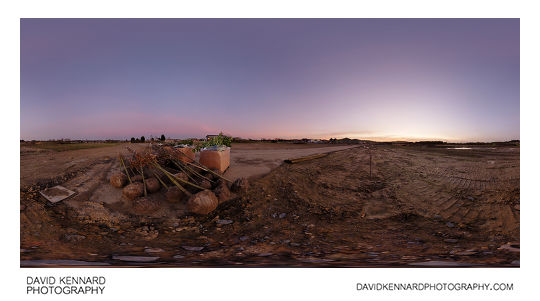
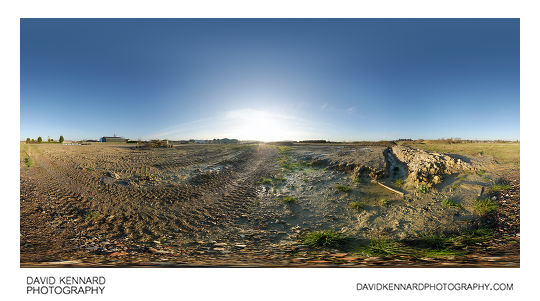
Eventually I noticed the clouds around the horizon had started to turn pink. So I took the pano above near some shrubs and trees waiting to be planted. 360VR version: Farndon Fields Jan 2012 (II) 360 VR.
Then shortly after, the light got a lot better (in my opinion anyway). I had already scouted out a big puddle that I thought would be good for a sunset reflection, just across from the previous pano.

You can see the 360VR version here: Farndon Fields Jan 2012 (III) 360 VR. I used the tripod with the legs unextended, as the camera needed to be quite low to catch the reflection in the puddle. The mud was very soft, you can see quite a few of my footprints in the image as I had to move around to keep out of the individual shots that make up the pano.
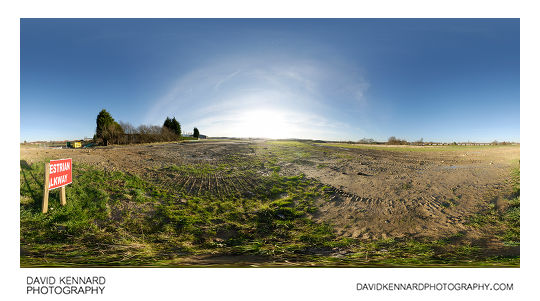
I then came back the next day to get some daylight panos. The 360VR version of the above is at: Farndon Fields Jan 2012 (IV) 360 VR. After the development of Farndon Fields started, 'Pedestrian Walkway' signs were put up at various points next to the footpath that runs across the fields. The one in the pano above is one of the few surviving signs, most of the rest seem to have been destroyed now (I'm not sure why though).
It would be quite nice to take some panos of the actual building work going on, however with all of today's health and safety regulations and our compensation culture, I think it is unlikely I would be allowed to do that.
I did take this pano (above) by the footpath, out of the way of all the work. You can see the 360VR version here: Farndon Fields Jan 2012 (V) 360 VR.
The pano above is taken nearby where I had taken the trees & shrubs and big puddle panos at twilight the day before. The 360VR version is: Farndon Fields Jan 2012 (VI) 360 VR.
I also took some sunset / twilight photos, again capturing the reflection in puddles, but a different puddle to where I took the pano. I haven't processed the 'normal' photos yet though.
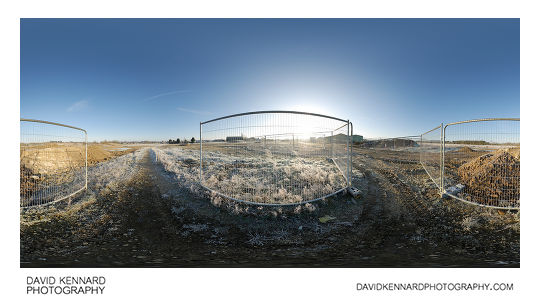
The next morning I went back to take a couple more panos, and it was a nice frosty morning. The 360VR link for the one above is: Farndon Fields Jan 2012 (VII) 360 VR. Where the footpath gets to a farm track that goes across the field, there is this big metal fencing put up around the footpath. I have no idea what purpose it is meant to serve though.
For this pano, the tripod shadow was being cast onto the metal fence and pile of mud / rubble. At the time of taking the pano, I took an additional shot in the shadow direction, but with the tripod moved to the left slightly (so the shadow was cast in a different place). This additional shot was just for the purpose of removing the tripod shadow when processing the panorama.
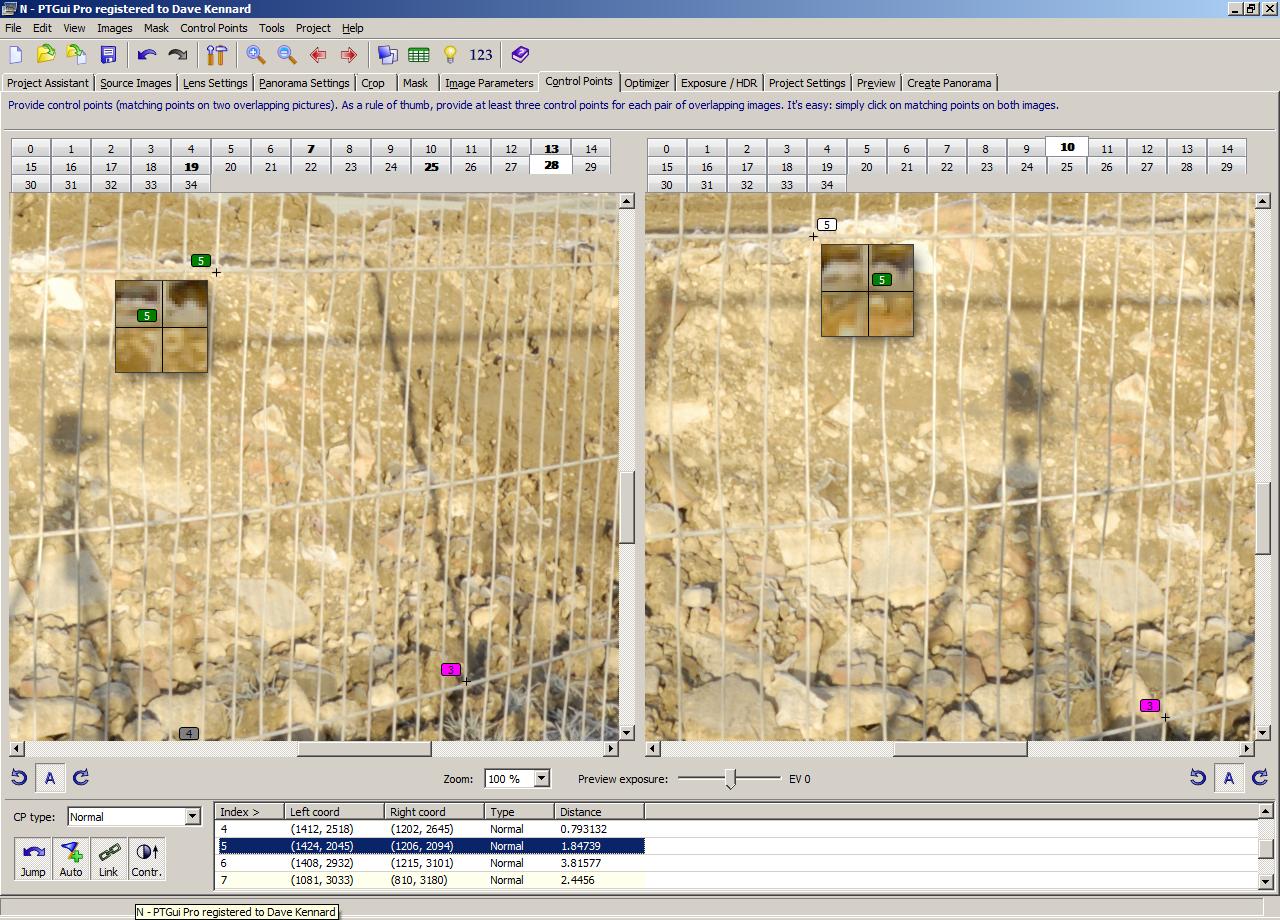
If these images were stitched normally, the offset image would have bad blending issues due to parallax. With automatic control points and viewpoint correction, the offset image would stitch okay, but the fence would be messed up since the control points would all be placed on the background.
You can't correct for parallax of both the background and the foreground (fence), so what I did was to use viewpoint correction and manually place control points on the fence. Since the fence has no features to match between images, I did this by starting at the edge of the fence, and then counting the rungs in up to ten. Then I placed a control point there, doing the same on both the offset and standard images. From there I could either count more rungs to the left, and up or down, repeating the process until I had a number of control points placed.
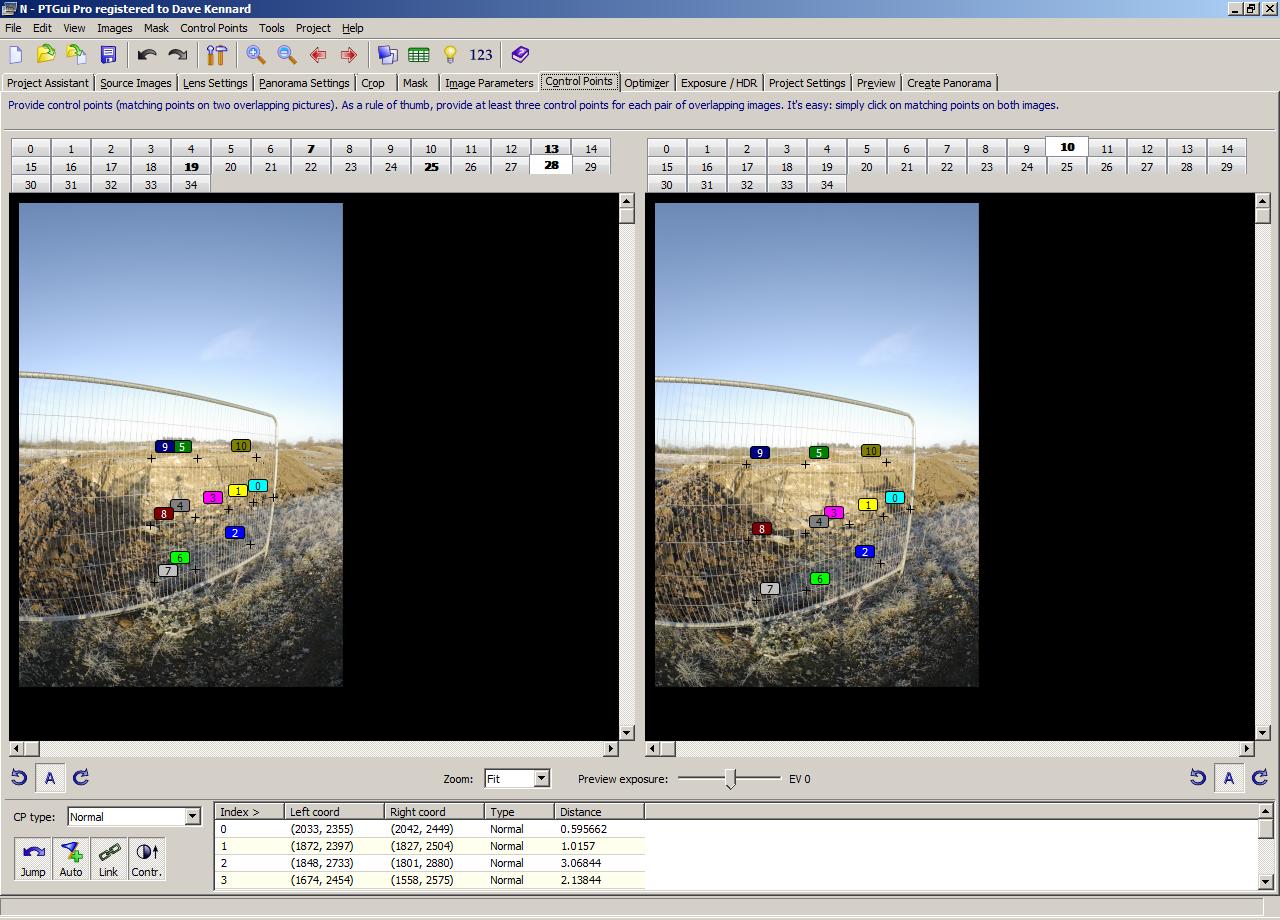
This meant that the offset image was stitched with parallax corrected for the fence. The background still had parallax issues, but since the background was random mud and rubble, I wasn't bothered about this. The result is an image where the fence is stitched correctly, and there is no tripod shadow.
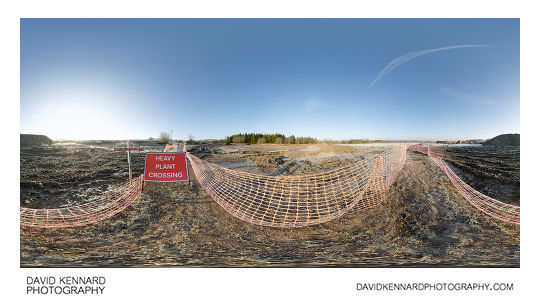
Further 'up', near the south of the development, a 'heavy plant crossing' sign had been helpfully placed right in the middle of the footpath. The footpath wasn't closed, and no work was being done in this area on the 3-4 days I visited the fields. The VR link for this one is: Farndon Fields Jan 2012 (VIII) 360 VR
For this pano, I didn't take an offset shot for removing the tripod shadow. The 'fence' was not flat, and so wouldn't work so well for stitching with viewpoint correction. Instead I used the good ol' clone tool and also took parts from the handheld nadir shot (which was obviously missing the tripod shadow).
My handheld nadir shots are always offset a bit from where they should be, so I had to apply warping to the copied bits to try and fit them into the correct positions.
You can see in the finished pano there are still some bits where I didn't remove the shadow. Removing it was quite time consuming, and my thought is that as long as most of the shadow is removed, most people probably wouldn't notice any small bits of shadow left.
You might notice that a few of the panos also have sound on them (if you view the 360VR versions). I keep forgetting about recording sound, but at least I remembered for a few of them. I recorded some tests with various settings on the recorder as well, so I'll put the test sound files up on the blog for anyone interested in a few days.
Leave a Reply