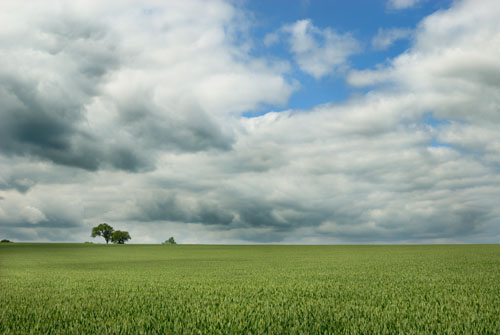
In this tutorial I'll show you how to improve a flat, low contrast photo, to add some 'pop' to it, particularly enhancing the clouds.
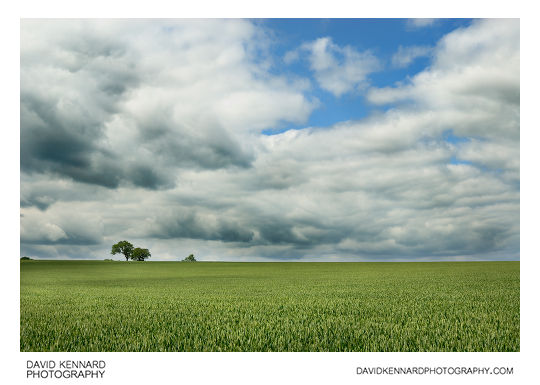
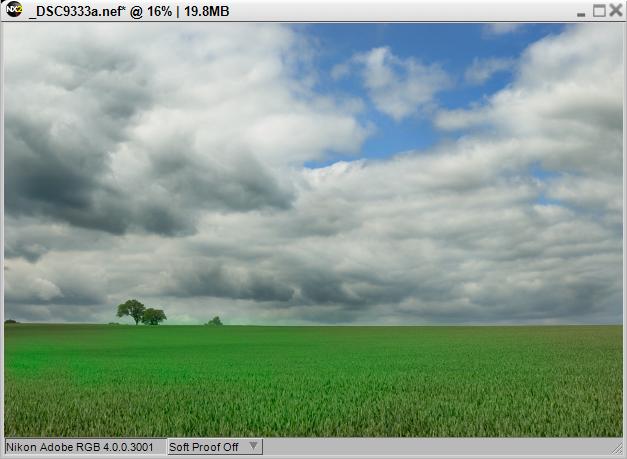
Below is what the image looks like when the adjustments are done:
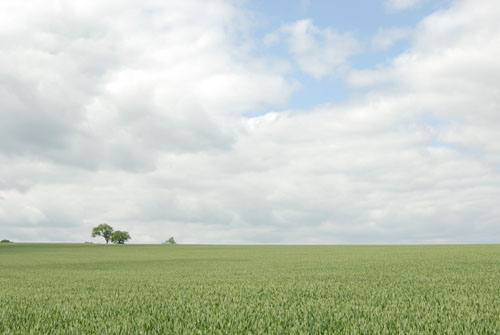
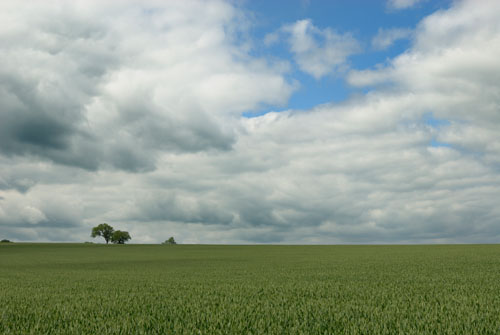
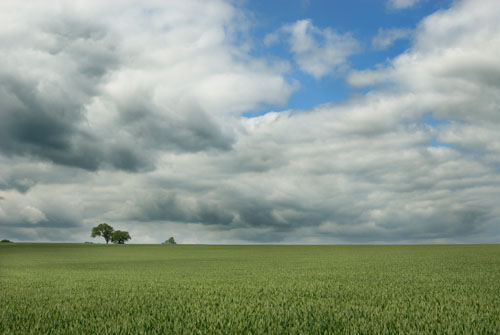
Below is the original photo when processed through Nikon Capture NX 2 with the default settings. As you can see, it is quite flat, but there is some texture in the clouds that we can try and bring out. If you want to work through this tutorial using the same image, you can download a copy of the NEF file here.
Hopefully you will agree that the processed image is better than the original. If you think the effect is too extreme, you can still follow this tutorial to make your images pop, but just dial down the opacity on each of the adjustments so they have less of an effect. Likewise, you can make the adjustments more extreme if that's to your taste.
In this tutorial I will be using Nikon Capture NX 2, mainly because of the excellent U-point technology it uses for applying selective adjustments, but also because I am working from a Nikon NEF file, and I prefer to stay in the RAW convertor whenever possible. If you don't have Capture NX 2, you can perform the same adjustments in Photoshop, just you will have to paint the selection masks manually instead of using the U-point selections.
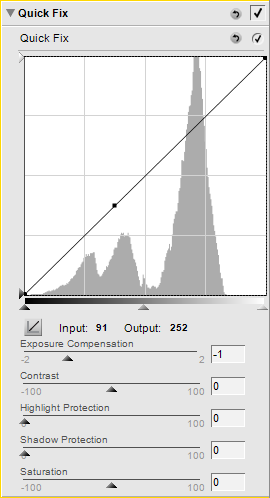
Darken the image
We want to try and add some 'pop' to the clouds, so we start by darkening the image by applying -1 exposure compensation.
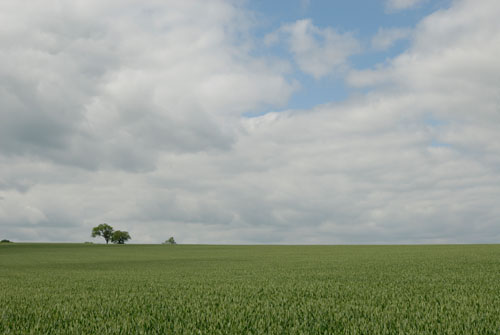
This makes the field a bit darker than we want, but don't worry, we'll brighten it up later. After the exposure adjustment the image looks like this:
Add some pop to the clouds
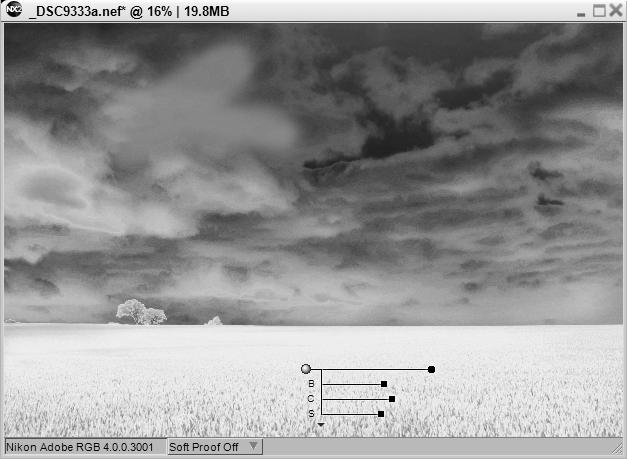
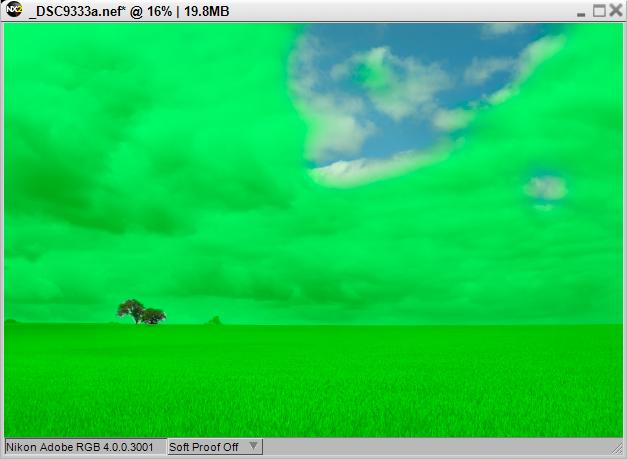
Next we apply a heavy curves adjustment to make the clouds pop. Put the tone curve in overlay blend mode, and mask it so that it is only applied to the clouds. The edit step in Capture NX 2 looks like this:
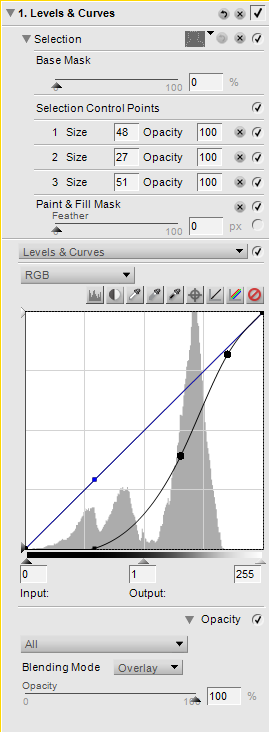
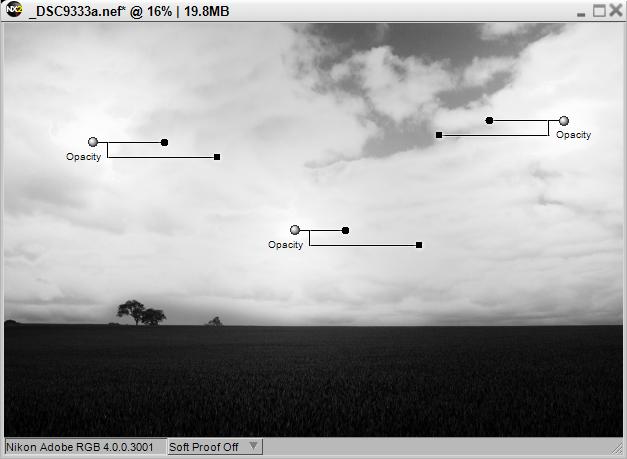
And the mask looks like below. I used 3 selection control points and also painted out part of the field that was partially selected.
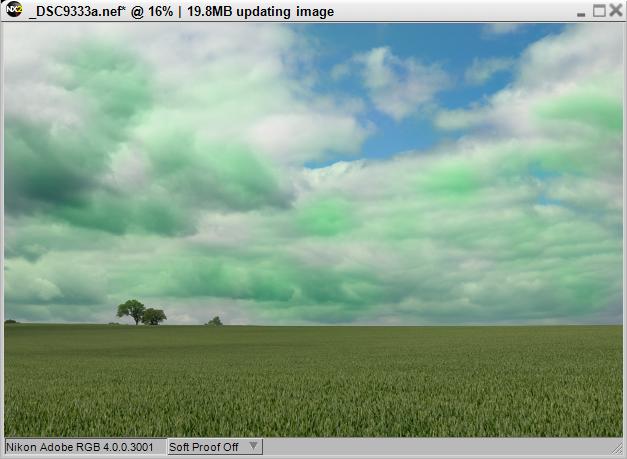
Below is what the image looks like now. You can see the curves adjustment in overlay blend mode has already added a lot more 'pop' to the clouds, enhancing the clouds' texture.
Burn the clouds
Next we want to 'burn' in the dark areas of the clouds. I won't go through the full details of dodging and burning in this post, please see my previous tutorial Non Destructive Dodging & Burning in Photoshop and Capture NX. The image below shows the selection (green) where I 'burned' the clouds:
After burning the clouds we end up with this:
Dodge the landscape
Now we'll brighten the field by dodging it. As with the burning, please refer back to my previous tutorial Non Destructive Dodging & Burning in Photoshop and Capture NX if you're not sure how to do this. My selection (shown green) for the dodging looks like this:
The resultant image so far looks like this:
Increase the contrast
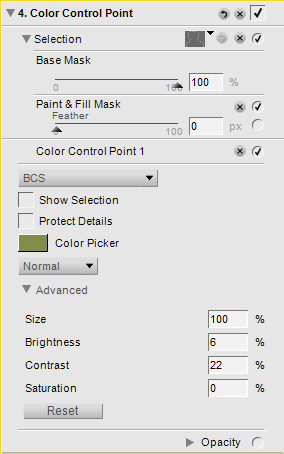
Next apply a Colour Control Point, I used a setting of +6 brightness and +22 contrast, and made the point as large as possible to cover most of the image. The edit step for the colour control point in Capture NX is below:
The selection made by the colour control point looks like the below. You can see I also painted out a bit where I thought the adjustment was causing an area of the clouds to blow out.
After adding the colour control point, the image looks like below:
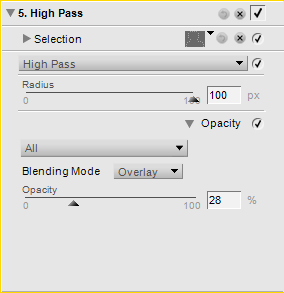
Apply Local Contrast Enhancement
As a final step, apply some Local Contrast Enhancement. To do this, use a High Pass Filter (under the Adjust > Focus menu in Capture NX) with a large radius:
I masked out the blue sky and the trees on the horizon as I thought it made the trees too dark and the sky too saturated. The selection (shown in green) looks like this:
And we end up with the final image:
As always, comments and suggestions are welcome.
Great sample. Thanks for posting!
Thank you David for this simple yet deep tutorial – much about NX2 photo-editing can be inferred from it.
Thank you for the wonderful post. Detailed with helpful screenshots. Will surely look forward for more tutorials from you.
Thank you for the post. It is useful.
Thank you for this highly illuminating and comprehensible illustration of some very useful procedures in NX2!
Thank you for sharing, very good information.
Can you make a portrait tutorial as well?
Hi Rani
I don’t tend to do much portrait work myself. Any adjustments I do on portraits tend to be limited to white balance and curves to brighten and add contrast. I found this video on youtube that gives a good overview of portrait retouching in capture nx2: https://www.youtube.com/watch?v=IJlOCjYV4K0
i hate this software. I want to use it because it works in 16 bit but I hate it. Its worthless. All I need to do to my photo is create an alhpa channel selection of the areas I want sharpened.
I have duplicated my image and used the curves to make it black and white. I have created my selection. But I cannot copy and save the resulting mask to another photo: it does not work, even when you choose to copy the adjustments and paste them because the one photo is B&W and the other is color so when the mask that worked on the B&W file are applied to the color, it changes?! What retards developed this?!
Hi Nate
Masking is pretty basic in CNX. If you need to do masking where you’re using a modified image for the mask you’d need to use something like Photoshop instead. You can get a Photoshop plugin from Nik called Viveza that adds control point functionality for brightness, saturation etc. like that found in CNX.
I think Nikon might have abandoned CNX now as there hasn’t been a new version in ages.
Dave