Living in Cloudy Sky England, you rarely find that your camera has enough dynamic range to record a scene as your eye sees it. In your photos you will normally find that either the sky is a blown out white while your subject (in my case usually the countryside) is exposed properly, or the sky will be exposed properly and your subject will be very dark.
For this reason I always shoot bracketed exposures (-1ev, 0ev, +1ev on my Nikon D200, though if you're lucky enough to own a Canon DSLR you can try bracketing -2ev, 0ev, +2ev). I can then take the bracketed exposures into Photoshop CS4 and blend them to produce an image taking the best parts from each exposure, producing an image that more accurately represents the scene as I saw it. For more information on exposure bracketing, see my previous post on auto bracketing.
Video of the process from start to finish
In the video below you can see the full process I go through to create an image from a photograph that was bracketed ±2ev in steps of 1ev (so 5 exposures in total). The video has been sped up by 4x and the saving/processing bits sped up by 10x - I can't work that fast, and my PC certainly isn't that fast either unfortunately.
https://www.youtube.com/watch?v=JzaFdIC_1PoThe video starts by showing the 5 exposures (-2ev, -1ev, 0ev, +1ev, +2ev), and then what the final image will look like when I've finished processing the images.

EV-2

EV-1

EV0

EV+1

EV+2

Final image
Convert the RAW files
I start by batch converting the RAW files (NEFs) to 16 bit TIFFs in Nikon Capture NX. I find that Nikon Capture NX does a much better job of converting Nikon RAW (NEF) files than ACR. Before I actually start the batch conversion, I make sure that my preferences file is loaded that sets sharpening to 0 (and also pulls back the exposure on each image by ⅓ stop).
Align the images in Photoshop
I have to wait for a few minutes while the RAW files are converted to 16 bit TIFFs, then I browse to the folder containing the converted images and drag them into Photoshop CS4. I then go to File > Scripts > Load files into stack... and click on the 'Add Open Files' button. I tick the 'Attempt to Automatically Align Source Images' checkbox as the photos were taken handheld. If you took the photos with a camera on a tripod and used a shutter release cable you don't need to tick this, otherwise I would recommend that you do. I click 'OK' and then wait for Photoshop to align the layers. When it is done I close all the original images.

An alternative way to load the files into a stack in Photoshop is to just open Photoshop, go to File > Scripts > Load files into stack... and then choose 'Browse' and browse for the images you want to stack, instead of opening them in Photoshop before hand. This saves you having to close the original images after Photoshop has added them into a stack, though personally I find the first method easiest.
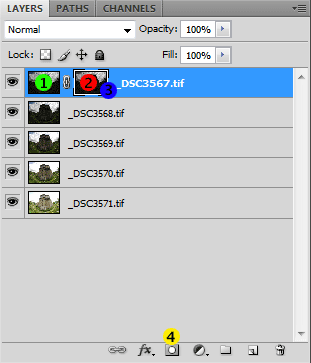
When you've got your image with the stacked layers aligned by Photoshop, you want to make sure that they are ordered from the under exposed image to the over exposed image in the layers palette, so in my case the images are ordered -2ev, -1ev, 0ev, +1ev, +2ev. It doesn't actually matter whether you arrange your images with the brightest on top to the darkest at the bottom, or the other way round, though I generally like to arrange the layers with the darkest image at the top. Photoshop automatically added the images as layers in the correct order for me, so I didn't have to do any layer re-arranging.

Start blending the layers together
Next I select my top layer and press Ctrl + Alt + " (in Photoshop CS3 the same command was Ctrl + Alt + ¬). This selects the luminosity of the image.

The 'marching ants' show the selection based on the luminosity of the image
Now I click on the Layer Mask button, which creates a Layer Mask for the current layer based on the selection. I Alt-click on the thumbnail for the layer's layer mask in the Layer palette, this lets you view the layer mask.
A quick guide to using layer masks in the layer palette
- Image thumbnail
- Layer mask thumbnail
- White border around layer mask thumbnail indicates it is currently selected
- Layer mask button (to add a layer mask)
Use layer masks to show/hide portions of a layer
In the layer mask, you use black paint to hide the layer, or white paint to show the layer. If you aligned your layers so that you started with the brightest image on the top, you'll need to press Ctrl + I to invert the layer mask so the brightest parts are hidden (black) and the darkest parts are shown (white). If you arranged the layers from darkest to brightest like me, then there's no need to invert your selection.
I paint black onto the Castle and ground as I want to hide these on the current layer as they are too dark. Rather than just painting the whole bottom section of the layer mask black, I paint a line going from one edge of the image, round the top of the castle, to the other edge of the image. Then I use the Polygonal Lasso to draw through the line I've just painted and around the outside of the bottom section of the image to select the bottom half of the image that I want to hide on the current layer. I then fill this area with black (Alt + backspace to fill with your foreground colour).
A few points to make here:
-
It is important that that you use a relatively soft edged brush when painting on layer masks or the transition between one layer and the next layer will be too harsh and obvious.
-
Generally you must paint on the layer mask inside your object, and take care not to let your paint spill over from the area you want to show/hide to the area you want to hide/show. Since you originally create the layer mask based on the Luminosity of the image, this takes care of the transition between the area you want to show/hide and the area you want to hide/show.
-
Even if your layer mask already looks black where you don't want the current layer showing through, you should still paint it black. This is because if the area isn't pure black, then some of the layer you are working on will show through. Since it's unlikely that all your layers align exactly, you want to minimise the number of layers being shown to avoid any alignment problems and maximise image quality.
After filling the top dark layer's mask with black where the castle and landscape are, I switch back to viewing the normal RGB images by clicking on one of the thumbnails for the images in the layer palette. I can now see what the image looks like with the layer mask applied to the top layer, and check that it looks okay.
I try switching the next layer (-1EV) on and off to see if I need it, or if I can skip it and just hide it completely. I decide that I need to use it, so press Ctrl + Alt + " to make a selection based on the image's Luminosity again, then making sure that I am on the correct layer in the layers palette, press the Layer mask button again to create a layer mask based on the current selection.
This time I don't switch straight to the layer mask view, but instead paint on the layer mask while the image is still visible. You still need to make sure you are painting on the layer mask rather than the actual layer though, you can do this by single left clicking on the thumbnail for the layer mask for the current layer. I decide that I would like to keep the sky from this layer, so I start to paint it white.
After painting a white outline between the sky and castle/landscape, I switch to view the layer mask by Alt-clicking on the current layer's layer mask thumbnail, and paint the rest of the sky white. I then do the same as I did on the top layer, and paint the castle and landscape black.
 layer")
I paint the castle black to hide it from the current (EV-1) layer
Fix ghosting
I switch back to view the normal image rather than the layer mask, and clean up some of the edges between the sky and the castle on the layer mask. I switch to the top layer's layer mask and paint in the bush on the right hand side of the image as this has some ghosting (see image below):

Ghosting is caused by imperfect alignment of images or movement between images. In this case the wind was blowing this bush, so it doesn't match up between the different images. To solve this I paint the bush in from the top layer, and also paint at a lower opacity on the clouds surrounding the bush to prevent the sky looking strangely dark just where the bush is (since I'm painting the bush in from the darker layer).
I'm using a Wacom tablet to do the painting with, which varies the opacity based on the pen pressure, but if you don't have a Wacom tablet you can change the opacity in the brush settings toolbar at the top of the window.

I would recommend getting a Wacom tablet though - it provides much more control than having to change the opacity in the brush settings.
I go on to the next layer, select the Luminosity again (Ctrl + Alt + "), then starting painting away the castle in the layer mask. When I get to the trees in the background on the left of the image, I see that they are getting a bit bright, so I paint them partially white (to keep them from the current layer). This also helps keep a good transition between the sky and the trees as you don't want the sky suddenly going from dark to light at the Horizon, so it is a good idea to overpaint slightly from the sky into the subject where they meet.
Next I alt-click the layer mask thumbnail to view the layer mask, and paint the castle black. This time I didn't paint a black line all the way from one side of the image to the other, so after making a selection and filling it black I paint black around the edge of the selection to make the layer mask exclude more of the castle and give a better more 'fuzzy' transition between the excluded (black) and included (white) areas of the layer mask.
I go back to view the layers rather than mask, and can see that the trees on the right hand side of the image are also getting a bit bright and that the transition between the differently exposed layers isn't that good there, so fix it up a bit.

The transition between the darker layer holding the sky detail and the lighter layer with the landscape detail needs improving
Next I go around the outline of the castle 'carefully' fixing up some ghosting that was happening along the edges due to imperfect alignment of the images. I wouldn't have ghosting along the building edge if I had used a tripod instead of taking the images handheld though.
Image blending nearly complete
I darken the trees on the left side of the image a bit more and clean up the castle a bit on the right of the layer mask. Then I add a layer mask to the next layer down, though this time I just add a plain blank layer mask. I start painting the castle out from the current layer. On the nettles around the base of the castle, I start by painting them out quite heavily, but then decide that they look a bit too bright, so I paint some of detail from the current layer back in.
After that I go back to the top layer's mask and paint out the sky on the left size of the image as I think it looks a bit too dark. I flick through the different layers switching them/their layer masks on and off to see if there's any problems I can notice. I think the clouds on the right hand side are a bit too dark, so I lighten them up slightly by painting them out with a low opacity black brush on the top layer's layer mask.
When that's done, I save the image. After a few minutes, the image has saved (since the image is 16bit it takes quite a while to save). I try lightening up the grass in the bottom left corner by painting it out on the +1ev layer mask (so the grass is showing through from the bottom +2ev layer), but then decide that actually it looked better how it did before.
It doesn't hurt to experiment a bit, to see what you think looks good, especially after you've just saved, since you can always go back to your last save. Even if you do a lot of small adjustments so your history gets filled up, so long as you saved before starting the adjustments you can go back if you don't like how the image looks with the adjustments.
Apply Local Contrast Enhancement
Now I'm happy with the image I created a merged copy of all the layers by pressing Ctrl + Shift + C, and then paste the merged copy twice. But before I do the paste I zoom in on the image, on a part that had some hard lines in it (in the case the castle roof). The reason for doing this is that sometimes when you paste the merged layers in they won't be aligned with the actual layers. By zooming in on a hard edge you will be able to see if there is any misalignment between the layers and the merged copy by switching the merged copy's visibility on and off, and moving it until they align if necessary. In this case the merged copy aligned okay when pasted, so I didn't have to do any aligning.
The top merged layer copy I apply Local Contrast Enhancement to (Filter > Sharpen > Unsharp Mask, with a small amount but large radius).

Then I add a layer Mask and mask out the section on the left where the sky meets the trees as I think the LCE brightens the sky in that area too much. I change the Layer's blend mode to Luminosity, and then move it down below the other merged layers copy.
Apply a Highpass Sharpen
Next I apply a Highpass sharpen (Filter > Other > Highpass, with an amount around 1px) to the top merged layer copy, and change the blending mode of the layer to Overlay.

Add some contrast with curves
I apply a curves adjustment layer, and make a slight S curve to increase the overall contrast slightly. I switch the layer on and off to make sure I think the image looks better with the tone curve than without it.

Set crop marks
When I think it looks okay, I zoom into the edges of the image and drag guidelines to the edges of where I intend to crop the final image. If I'd used a tripod to take the photos, the images would be aligned perfectly and fill the full canvas so I wouldn't need to do this.
After adding in the guidelines for cropping I save the image again. A few minutes later the image has saved, so I flatten the layers (right click on a layer and choose 'Flatten Image' or go to Layer > Flatten Image on the main menu bar at the top of Photoshop).
Finished
Now the image is flattened I can crop it using the guidelines (make sure you have View > Snap ticked, and View > Snap To > Guides ticked). I also convert the image from 16bit to 8bit, and then save it as a JPEG with maximum quality.
All done!

If you have any questions or comments on this tutorial, please leave a comment below, or use the website's contact form.
Dave
Leave a Reply