Back in the summer I finally purchased some equipment to allow me to take ultraviolet photos with my Fuji IS-Pro camera. Thanks to the wet summer weather, planning my autumn holiday, and the difficulty of UV photography, I hadn't really had much to share on the subject yet.
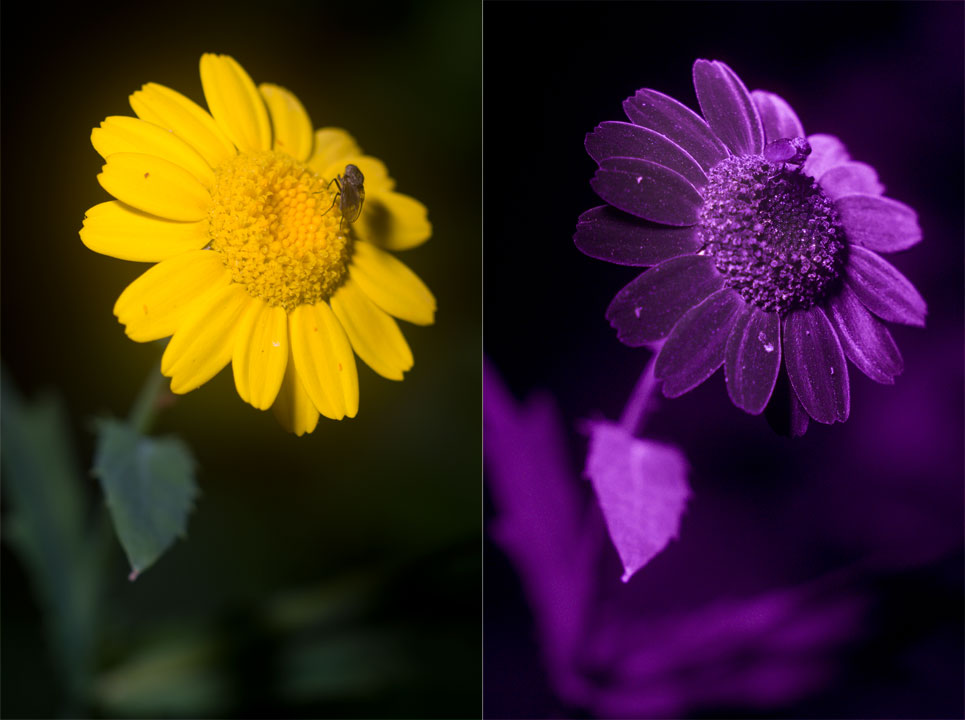
Visible and UV photos of a yellow daisy like (aster) flower - in this flower both the petals and centre are much darker in UV
But recently I bought some cut flowers and spent a good block of time practising with my equipment. I'm still not at a state where I can produce good UV and multispectral photos, however I can share a few shots and what I've learnt so far.
UV Photography - What and Why
Ultraviolet (or UV) photography means taking photos using only ultraviolet light, rather than using visible light like a normal photo. Just like Infrared photography, the world can look quite different in ultraviolet to how we see it normally.
The main use for ultraviolet photography (for my purposes at least) is photographing flowers. Some flowers have hidden patterns or markings that show up only under ultraviolet light. Bees and other insects can see in ultraviolet, and it is thought that these hidden markings are used to help insects identify where the nectar is.
So far I haven't had much luck at finding any flowers that have a good UV marking on the petals. So I think the UV nectar guides are probably not on the majority of flowers. However, all flowers do have a very dark centre (where the nectar is) when viewed in UV compared to visible light. In visible light the centre is normally bright yellow or white, in UV it is almost black.
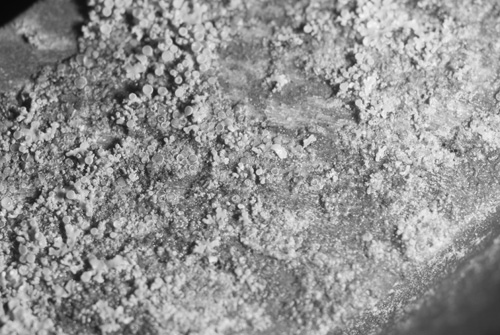
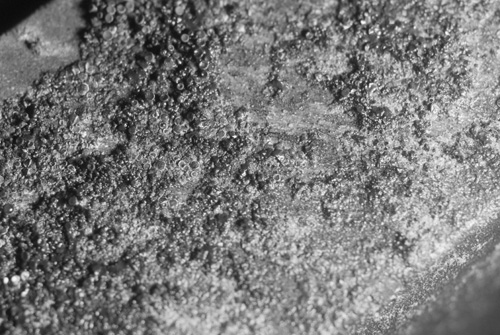
The above photos (top visible light, bottom ultraviolet) are of a crustose lichen. You can see that (what I think are) the fruiting bodies (called apothecia) are very dark under UV light compared to visible light.
What equipment do you need?
UV photography requires quite a bit of specialist equipment. First you need a camera that is sensitive to UV light. Next you need a lens that transmits UV light (most modern lenses have coatings applied that block UV). You also need a filter that passes UV light while blocking visible light and infrared - these are very expensive. And lastly you need a UV light source, the sun is only suitable if your subject will not move at all.
For the camera, I have the Fuji IS Pro. There are various companies such as LifePixel that can convert standard cameras to full spectrum or ultraviolet cameras as well.
For the lens, I currently have an EL-Nikkor 80mm/5.6 lens. The EL-Nikkors seem to be generally well regarded for their UV transmission, e.g. see EL-Nikkor lenses in UV photograph and [UV] EL-Nikkor 75mm - 80mm - 105mm for UV?. (Both those websites are very good references for UV photography). Because the lens has no focusing mechanism, it requires using a focusing helicoid. My set up with the lens is as follows:
- Extension tube
- Nikon F to M42 adapter
- M42 17-31mm focusing helicoid
- M42 to M39 adapter
- EL-Nikkor 80mm/5.6 (pre-N) lens
- 34-52mm step-up ring
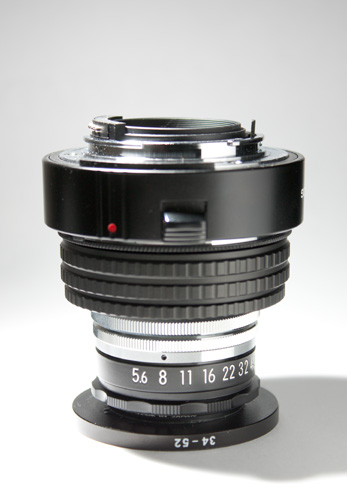
The EL-Nikkor 80mm/5.6 lens I bought is the older version with a chrome mount, there is also a newer version that is all black. The newer version is denoted with an 'N', i.e. EL-Nikkor 80mm/5.6 N. The version of the lens I have has a 34.5mm front filter thread. There doesn't seem to be any step up rings in this size (I spent a loooong time searching for them). So instead I bought a 34-52mm step-up ring and epoxied it to the front of the lens.
For the UV pass filter, I am using the Baader Planetarium U 2" filter (also known as the Venus filter). There are a range of UV pass filters available, but most have problems in letting through infrared. The Baader filter has very good cut off of visible and infrared light, while still passing a good amount of UV light.
The only problem with the Baader U filter is that it is very expensive. I bought mine direct from Baader in Germany, but it would actually have been cheaper to buy from a UK reseller (the postage was about £40).
When you get the filter, it is recommended to flip the filter glass for using it in front of a lens (instead of behind a telescope). This is a bit tricky, but not too problematic.
The filter consists of the metal filter ring, inside this is the filter glass. Screwed down on top of the glass is a retaining ring. The retaining ring has little notches at either side, and these can be (very carefully) gripped using the point of some scissors or tweezers etc. The retaining ring can then be rotated and unscrewed.
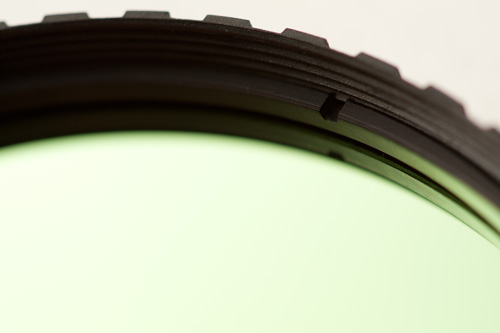
Notch in the retaining ring on the Baader U filter
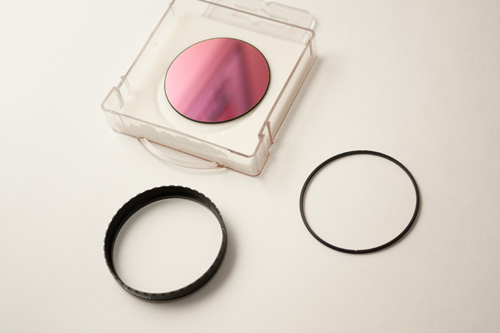
Filter after unscrewing
Carefully tip out the filter glass, then put it back in the filter the opposite way round. Then screw the retaining ring back on top.
The Baader U filter has a 48mm filter thread, so I have a 52-48mm step down ring to enable attaching it to the lens. I could have used a 34-48mm step up ring on the lens, which would have meant no step down ring was needed, but I think I couldn't find any 34mm step up rings in that size.
For lighting I have several modified Vivitar 283 flashes. Standard flashes do produce UV light, but have coatings on the flash tube or the front lens that block the UV light produced. So the flash needs to be modified to remove the UV blocking elements and allow UV light output.
I must point out this website which gives quite a bit of info on modifying the flash for UV photography: BeyondVisible Ultraviolet & Infrared Modified Vivitar 285HV/285/283 Flash - Nikon SB-140 Alternative. The modification is pretty simple. Undo the flash, then remove the yellow fresnel lens that covers the flash part. This is clipped on, though it is clipped on very tightly. (The fresnel lens blocks UV, which is why you must remove it).
After removing the fresnel lens it is a good idea to replace it with some clear plastic that does not block UV light. This is just to protect the flash tube. I cut some plastic from a CD case for this purpose. Then do the flash up again, and you now have a full spectrum flash.
I found that with one flash, the light output was not enough for a good picture. So I bought some more Vivitar 283 flashes and converted them as well. I now have four full spectrum Vivitar 283s.
The Vivitar 283 may not be voltage safe for connecting to a digital camera. You can check the trigger voltage if you have a multimeter, but I don't. So I just use a radio trigger and hot-shoe to PC sync adapters on the flashes to trigger them.
Testing my lenses for UV work
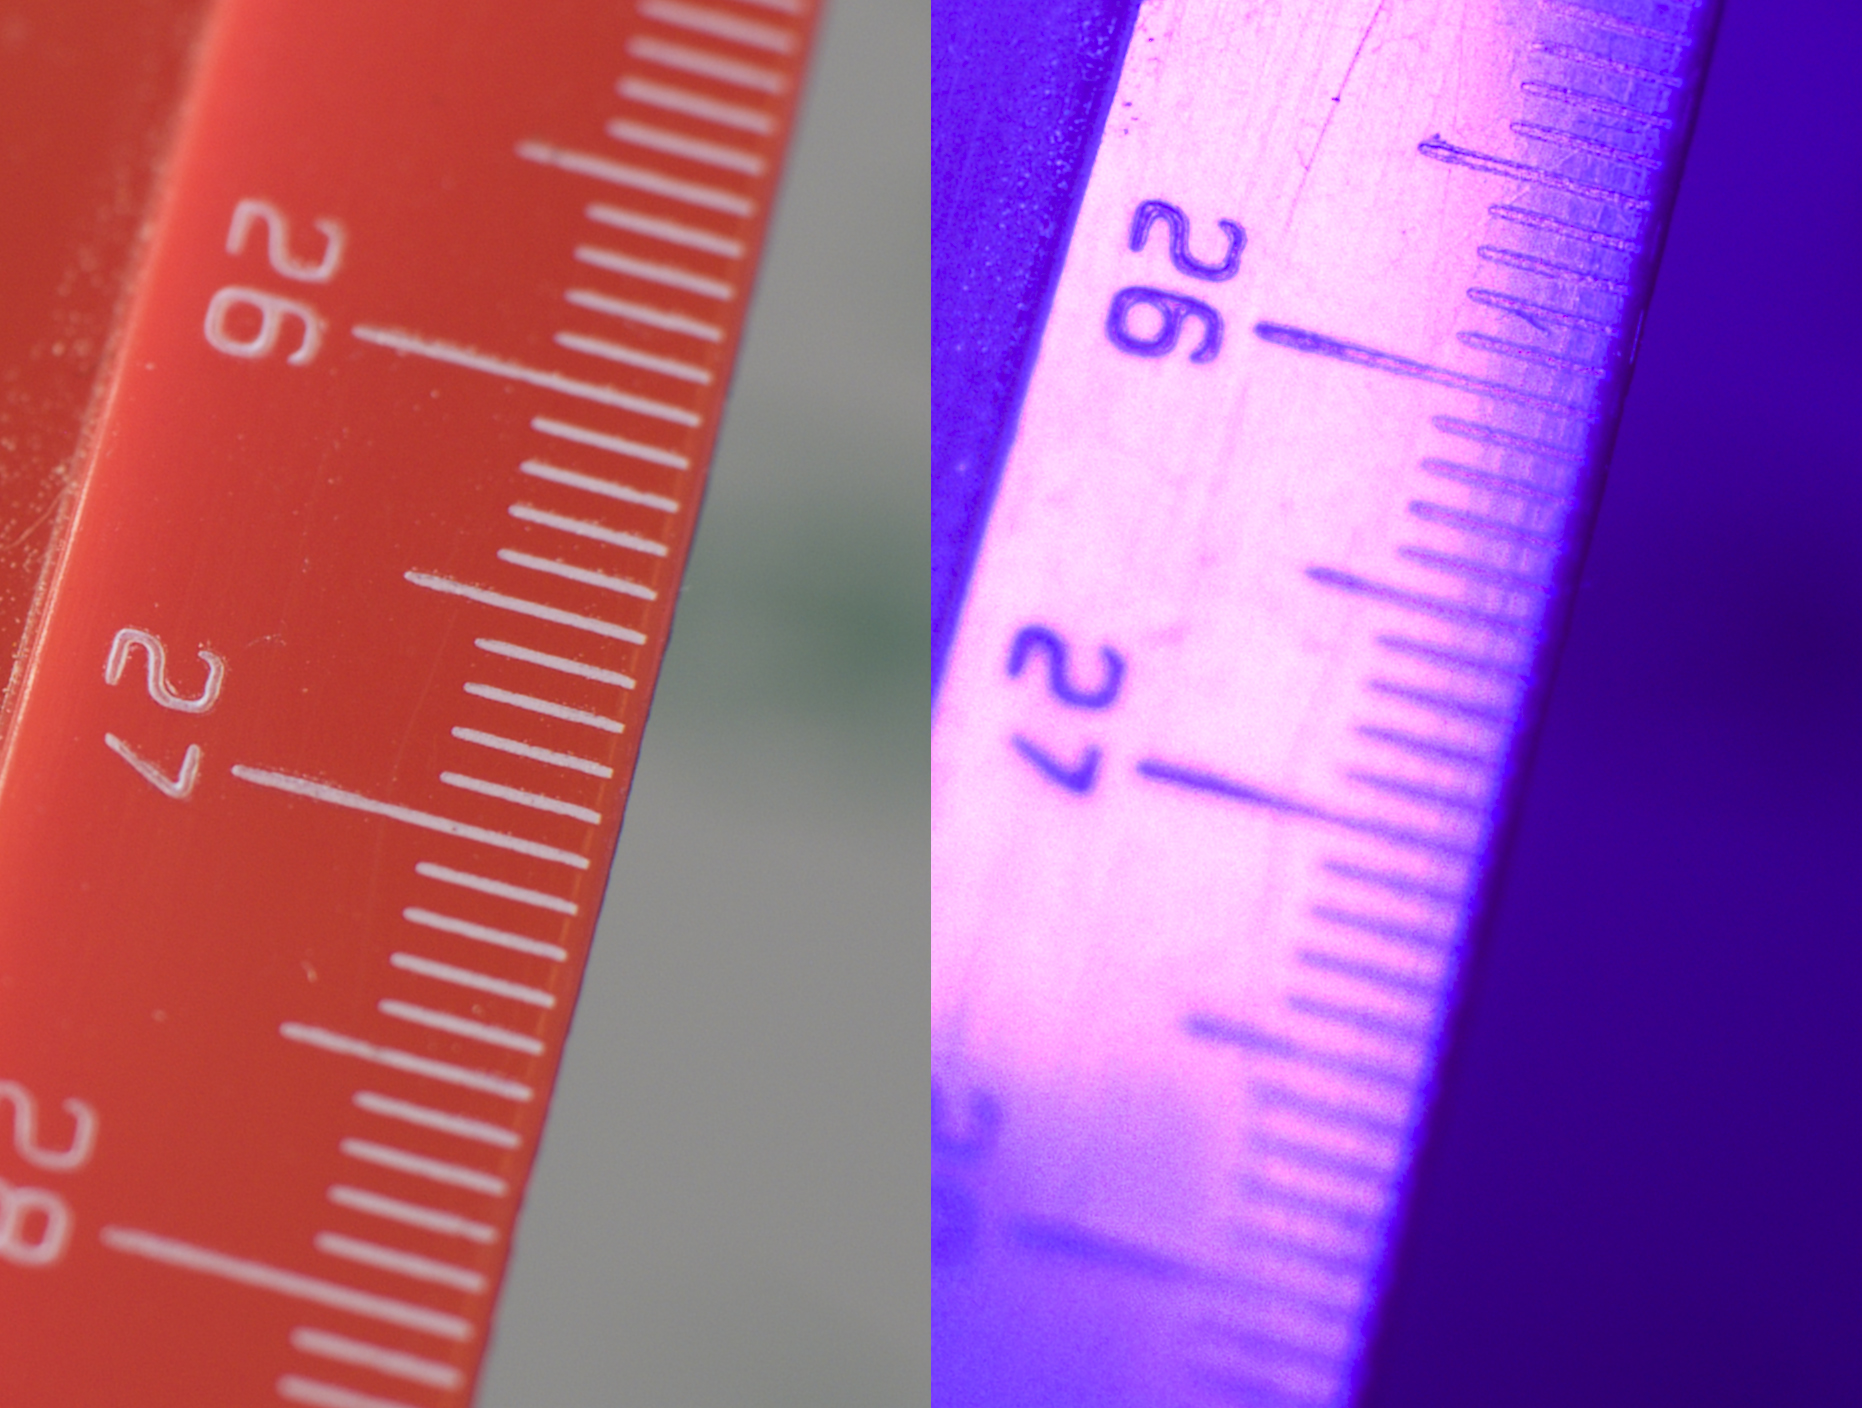
One of the problems with UV photography (and IR photography) is that most lenses exhibit focus shift. That is, the focus point in UV or IR will be slightly further back than it is in visible light. So you need to focus slightly closer than where you want the focus point to be.
Trying to focus when you don't know quite exactly where the plane of sharp focus will be is very difficult. Unfortunately the EL-Nikkor 80mm/5.6 lens I have does exhibit focus shift. I am wondering if there is quite a bit of sample variation with the lens, as others seem to have little focus shift with theirs.
I also tested my Nikon 50mm/1.4 D lens and 70-300mm/4.5-5.6 VR lens. The 50mm lens seems to pass the same amount of UV as the EL-Nikkor, with slightly more focus shift. The 70-300mm lens seems to have less focus shift, but does not pass as much light.
Below are some comparison crops from my test images of a ruler. Click the images to view the crops at 100% size.
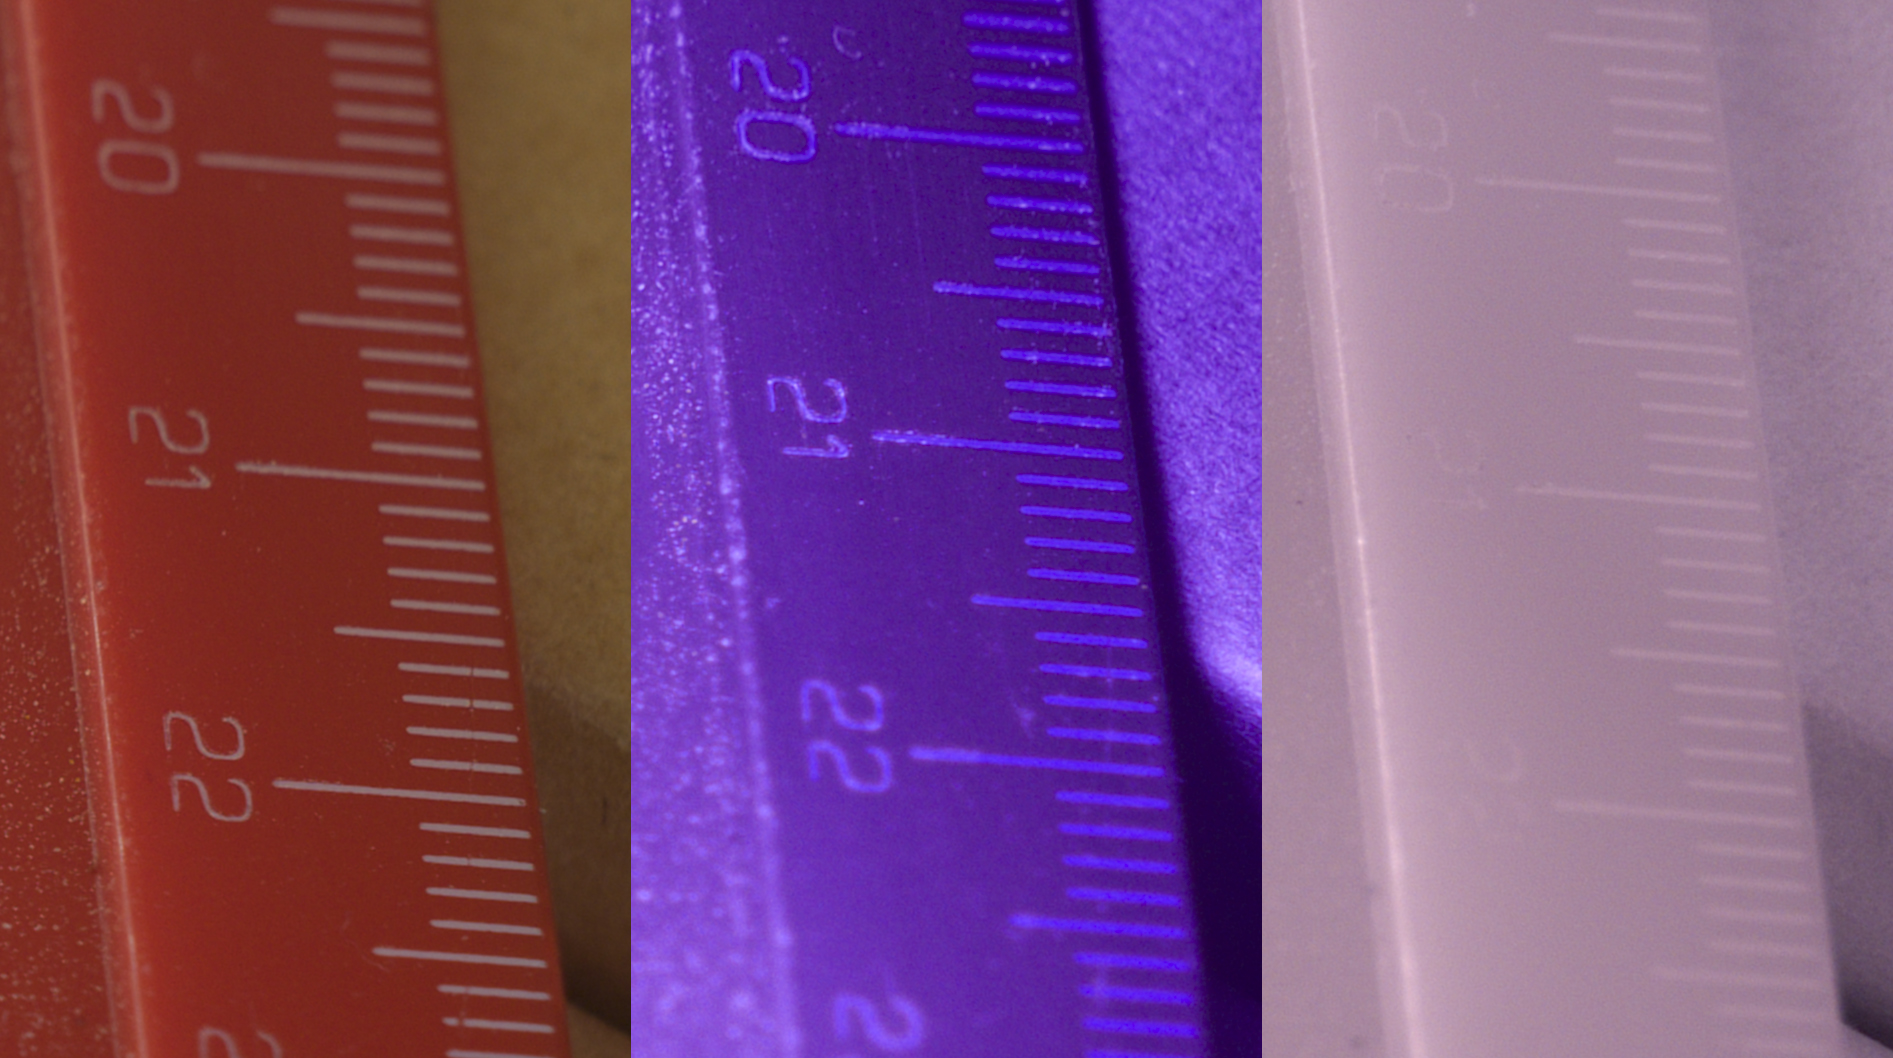
EL-Nikkor 80mm f/5.6
Nikon 50mm f/1.4 D

Nikon 70-300mm f/4.5-5.6 VR
Multispectral photography
Multispectral imaging involves photographing the same subject under different spectrums, and then combining these into a single image. I have tried this by photographing the same subject in UV, IR, and visible light. I then create a new document (in Photoshop), and use the visible light photo for the green channel, infrared for the red channel, and UV for the blue channel.
Getting the images to align for creating a multispectral image is very difficult though. As well as focus shift issues, the camera will move slightly as you add and remove the different filters needed for each image.
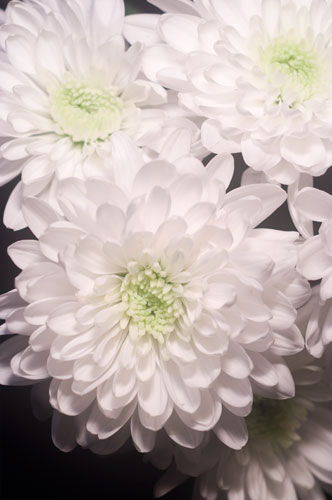
For the multispectral images below, I didn't correct for the focus shift, so the UV and IR photos don't have the focus point at the same point as the visible light image. I've included the visible, UV, and IR images so you can see how they look separately as well as combined into a single multispectral photo.
Flower 1
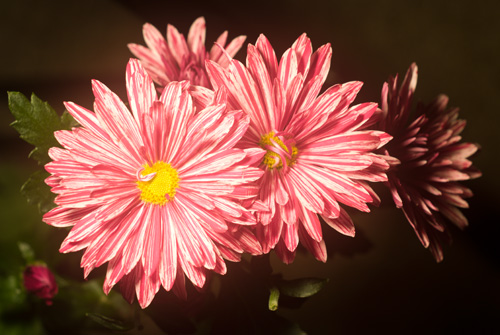
Visible
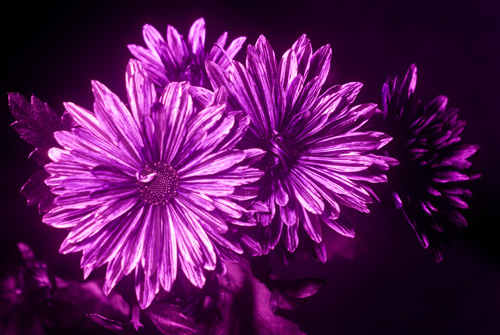
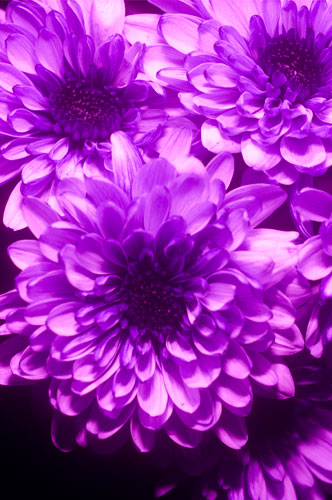
UV
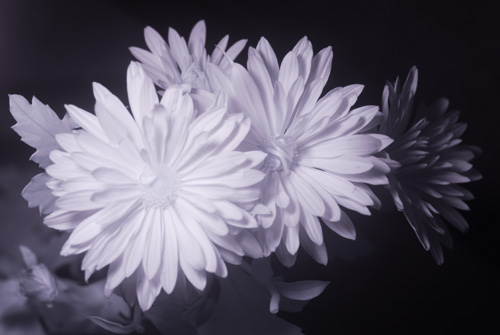
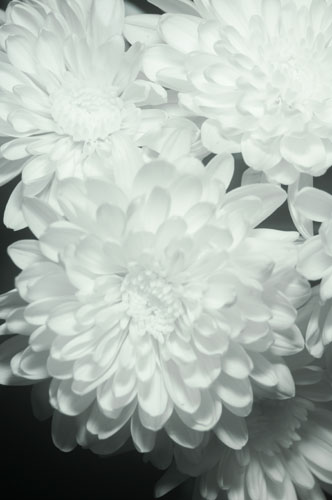
IR
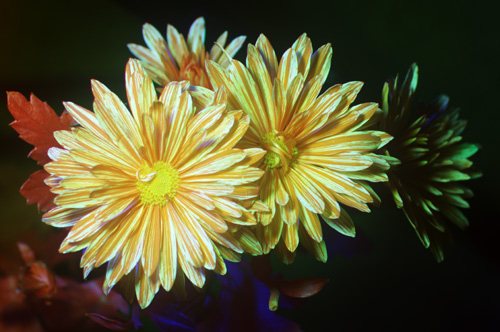
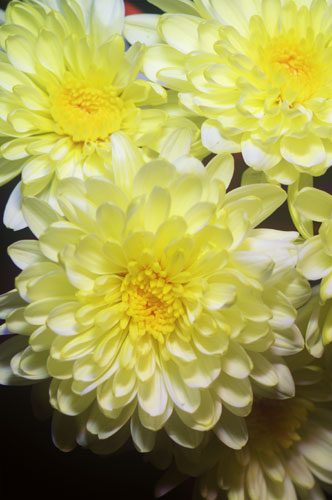
Multispectral
Flower 2
Visible
UV
IR
Multispectral
Rose
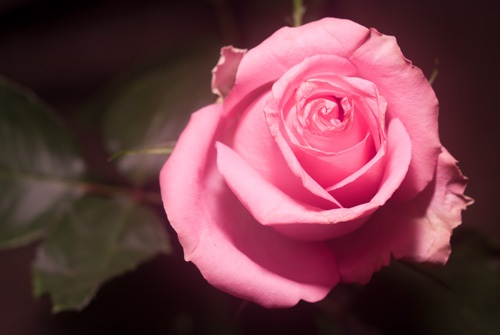
Visible
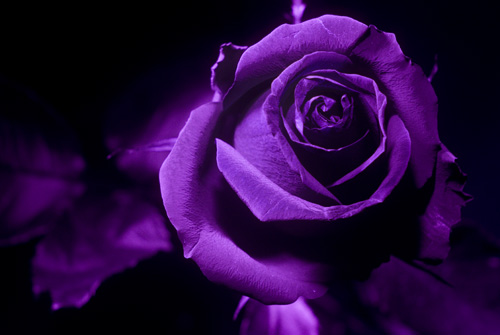
UV
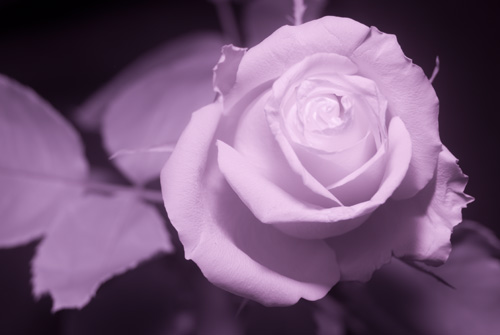
IR
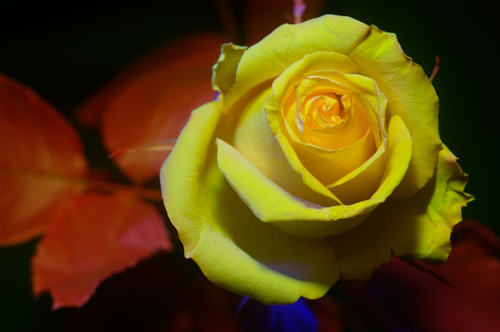
Multispectral
I am looking forward to the Spring and having a variety of flowers to try taking UV photos of. Until I have some more experience, I will likely be restricting myself to flowers in the garden and cut flowers. My UV photography kit (especially with a geared head and focusing rails on the tripod) is a bit heavy for taking out on walks.
Thanks for sharing! Bumped into your site by accident (google search). At the moment I only shoot visible and infrared, but am planning to do a conversion. So the information in this article (how to convert flash and use astronomical filters) was very useful.
Thanks Pierre, I’m glad you found it useful. I’ve since bought a 75mm EL Nikkor, but haven’t tested it yet – need some more flowers. I also bought a Wray 3.25in f/4.5 Supar enlarging lens, which I have tested for UV, and sadly it exhibited focus shift like my other lenses.
Hello Dave. I was checking out your UV work. Resolving the false UVcolours with judicious application of white balance sometimes reveals more of a flower’s UV signature. You might enjoy seeing our UV botanical collection on ultravioletphotography.com, so stop on by. “-) We also hang out and talk about filters and cams and other gear. Your software would not let me enter that website in the Website box. Oh well. Cheers – Andrea B.
Thanks for the comment Andrea. I’ve been hoping to experiment with white balance for some time, but haven’t got round to it yet. The main problem is ACR can’t set a true white balance in UV for my files (both temperature and tint sliders are maxed to the left). So I’ll need to work on creating a custom DNG profile to see what images with a proper white balance look like.
I’ll take a look at that website sometime. (Just had a quick look now, and looks like lots of useful information and great images). I’m not sure what the issue with WordPress not accepting the link was, but I’ve added the link to your name now.
Dave
Hello Dave, very nice blog and lots of useful information in here, thank you very much for sharing.
I have a question, how do you connect the Vivitar 283 flash to the Fuji IS-Pro? Can it be attached to the camera hotshoe? I need a good source of UV light that also needs to be portable so a hotshoe flash for my IS-Pro would be the best solution. Is this flash a good UV source after modification? Ideally I would need a good short range UV source as I will be mostly doing close-up photos. Thanks.
Alfredo
Hi Alfredo
Most Vivitar 283 flashes are very high voltage and you definitely don’t want to connect them to your camera as the high voltage would fry your camera’s electronics. Instead use a radio triggering system, a reciever on the flash and transmitter on the camera hotshoe.
I’m not really aware of a better UV light source, but I wouldn’t say the Vivitar 283 is a ‘good’ source of UV light, just it is the best (in terms of the trade-offs between light output, flash duration, cost, and portability) we have available. I think there are a couple of portable 400W/s flashes that can output UV, and obviously they can give a stronger output than the Vivitar 283. But they cost quite a bit more.
I do close-up photos with two Vivitar 283 firing at full power – I hold the flashes as close to the flower as possible without getting the flashes in the frame, and often have to use an ISO around 400.
I have a guide showing what I use for my flower photos here: Vis UV IR Flower Photography Guide. (Actually that’s out of date as some of the gear I use has changed, but it’s not much different).
Kind regards
Dave
Hi Dave,
thanks for the reply.
I am aware of better light sources convertible to full-spectrum, however I also need something light, portable, easy to convert to full-spectrum and cheap.
I found on Ebay some Vivitar 283 with a trigger voltage of 7-8 or 9 volts. As I am a total novice user of Fuji cameras I don’t know which voltage they support. On the manual is stated “nothing above 250V” as for Nikon, however the last thing I want to do is to fry the camera electronics. But I suppose that everything belove or around 11 Volts should be safe for any DSLR, is that right?
Alternatively could you please suggest me which radiotrigger works for the combination IS-Pro/Vivitar 283?
Cheers,
Alfredo
Hi Alfredo
Yes, I think that should be quite safe. I’d recommend testing the flash when you get it to make sure the voltage really is that low. A good guide to checking the voltage is here: Measuring the Voltage on a Vivitar 285 Flash (it’s the same process for all flashes).
The radio triggers I was previously using (shown in my Vis UV IR Flower Photography Guide) are labelled as RD-616 on the receivers and RF-616 on the transmitter. They use a PC sync connection, so you need a hotshoe – PC sync adapter for the flash.
The triggers I’m using now are model PT-04 CN II. These have a hotshoe connection, which I find much more convenient and easy to use than PC sync. They can be a bit flaky with rechargeable batteries but work fine with alkalines.
You do need to be careful when looking at radio triggers for the high voltage Vivitar 283 models as not all triggers will work with them. For the lower voltage models I suspect almost any radio trigger should work okay.
Regards
Dave
Hi Dave,
thanks for the link.
I think I will go for the low voltage Vivitar 283 then. Thanks for all your help, much appreciated.
Best,
Alfredo