I've been looking for a cheap stripbox for use with speedlight flashes for quite a while. A stripbox is the same as a softbox, just long and narrow. Recently I purchased a cheap umbrella style softbox, and by using this without the umbrella fully opened it can be formed into a stripbox shape.
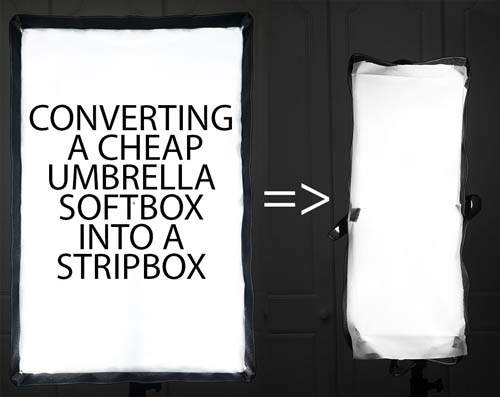
The softbox model I purchased is a Godox 60 x 90cm (24 x 35″) Umbrella Softbox for speedlight. This cost me £9.85 including shipping. It was shipped from the UK, so arrived pretty quickly.
DIYing the softbox into a stripbox
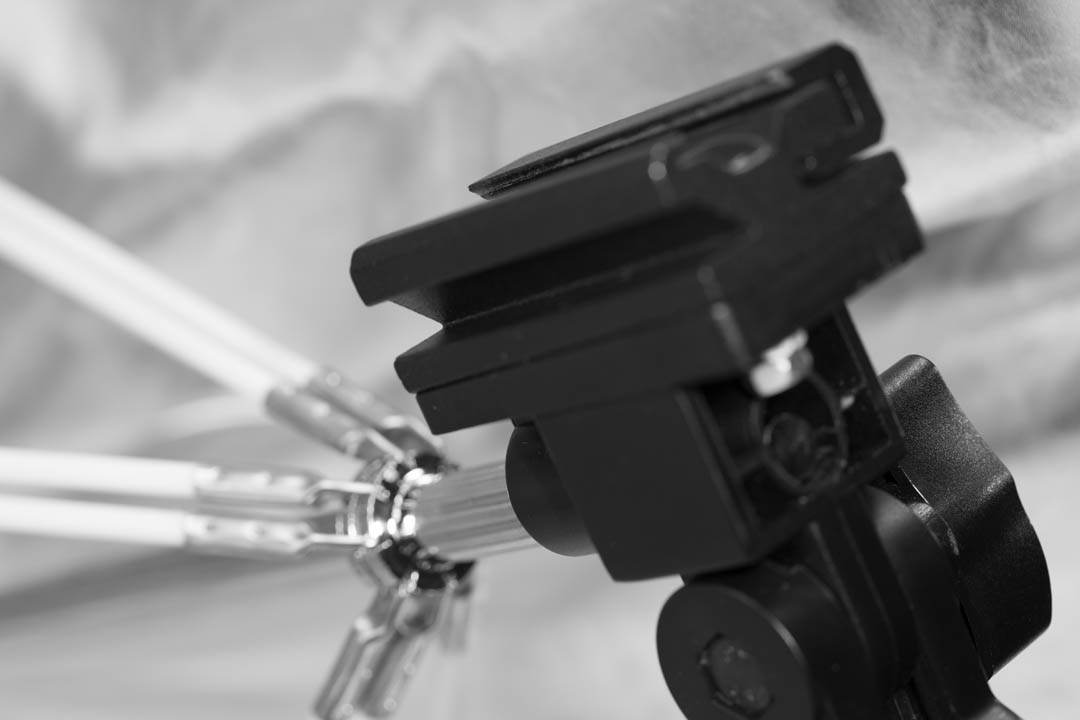
By placing the umbrella holder (which you'll need to purchase separately if you don't already have one) at the end of the umbrella shaft, this holds the softbox in a semi-opened position.
The umbrella ribs appear to be fibreglass rods, and are inserted into small pockets located at each corner of the softbox, rather than being sewn into the fabric. This is very useful as it allows attaching a wire between two pockets to get the softbox to conform to a long and narrow shape.
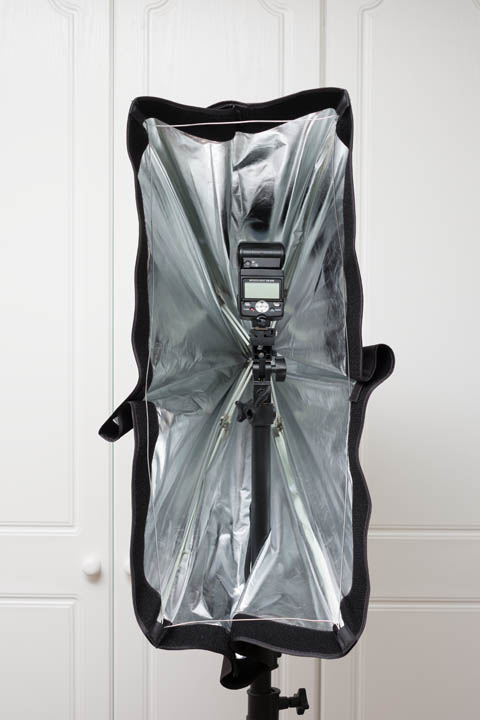
I used some craft wire, but old coat hanger wire would do the same job. You need two short pieces for the top and bottom, and two longer pieces for the sides. The end 2-3cm of each piece need bending so that they fit into the corner pockets of the softbox.
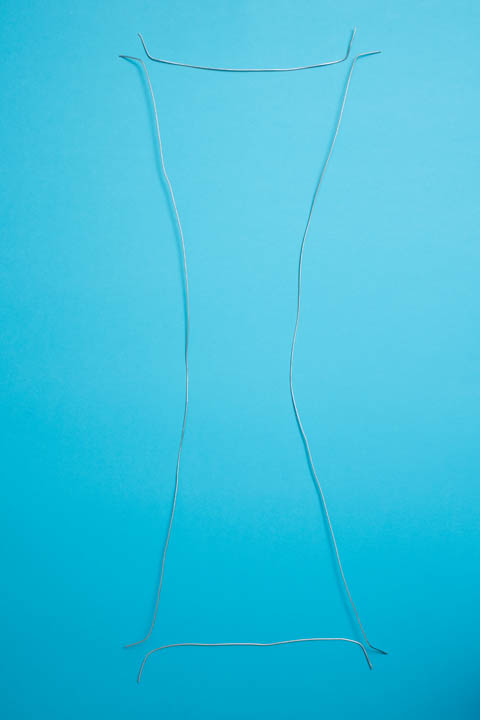
You'll notice my side pieces are quite bent. This is not because the stripbox is much thinner in the middle than the top and bottom. But rather because the depth of the stripbox is less at the centre than the top and bottom, due to it being a partially opened umbrella.

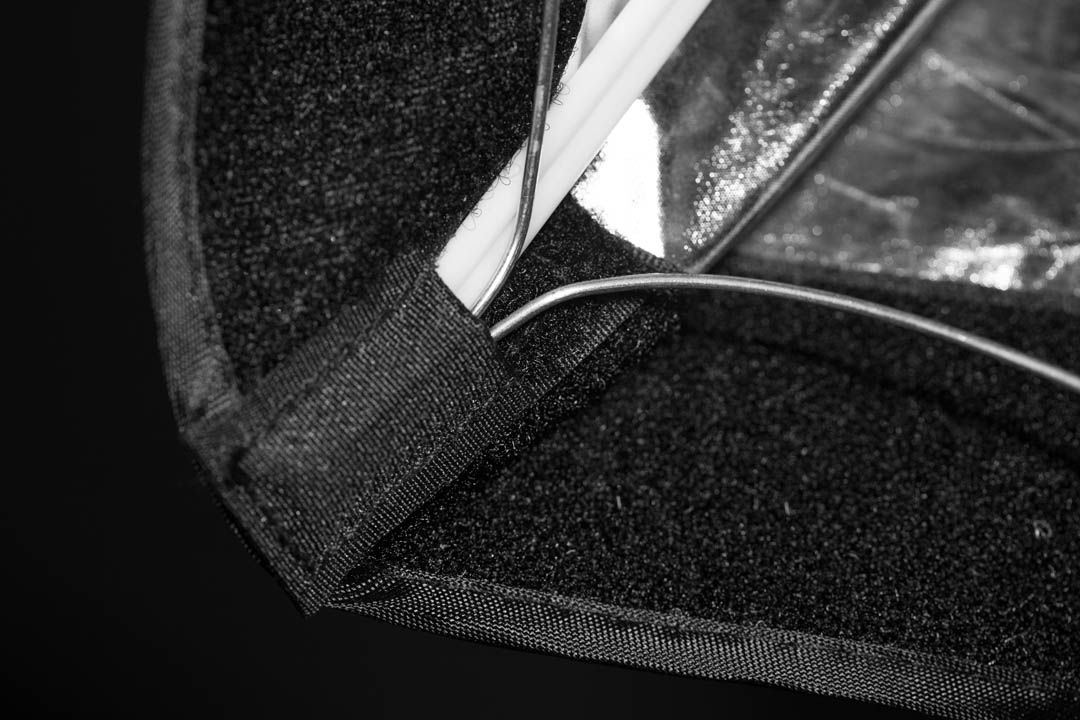
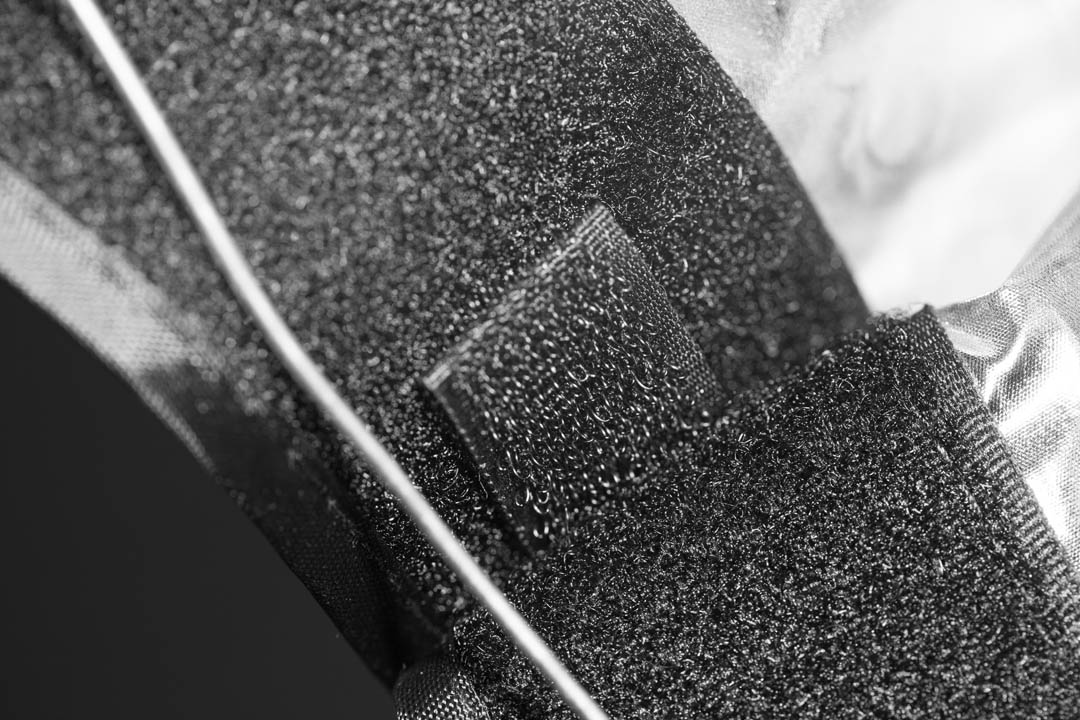
Squashing the softbox into a stripbox shape like this means the material along the sides is quite baggy. To correct this, we can fold over the excess material, then stick it to itself to keep it in place. Two pieces of hook velcro stuck back together create a double sided hook velcro piece. This can be used to stick the folded material together.
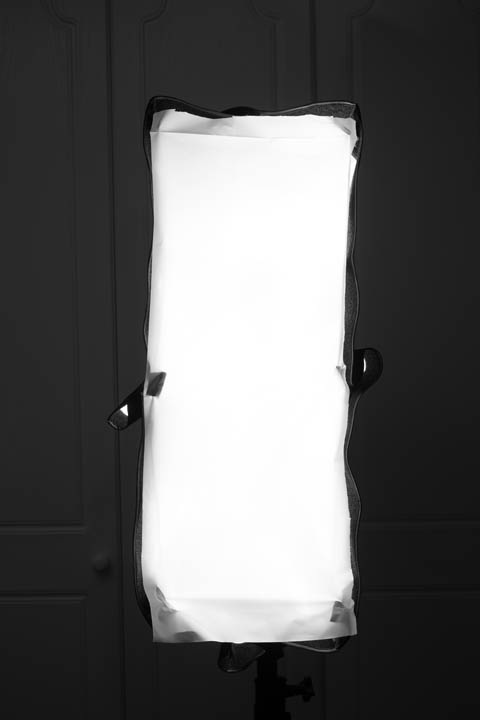
For the front diffusion panel I cut a piece of plastic banquet tablecloth. But you could use anything that's translucent white. Then hook velcro pieces were used to attach it to the stripbox.
The metal wires that keep the stripbox shape, double sided velcro pieces, and the front diffusion panel can all be easily packed into the softbox bag along with the softbox and original diffusion panel.
What's not to like?
This cheap DIY stripbox is far from perfect. To start with, you mount it by inserting the light stand through a zipped hole in the bottom. This means you can't rotate it. If you wanted to use it horizontally, you'd have to mount it on a boom arm.
If you want a grid for the stripbox, I'm not sure there are any commercial solutions available at the correct size. You'd probably need to DIY your own grid (strips of card with slots cut half way through at regular intervals to allow the strips to interlock).
While I think the stripbox is relatively easy and quick to set up, it's very unlikely to be as easy and quick as an actual stripbox.
The cheapest stripbox solution for speedlights I'm aware of would be something like a cheap eBay stripbox designed for studio strobes, for about £20. Or this one for £26, which includes a grid. Then a Godox S-type Bowens mount adapter for speedlights, for around £12.50.
The DIY stripbox solution is much cheaper, but probably a real stripbox is a better solution if you need a stripbox to use on more than just the odd occasion.
Comparison between stripbox and softbox configurations
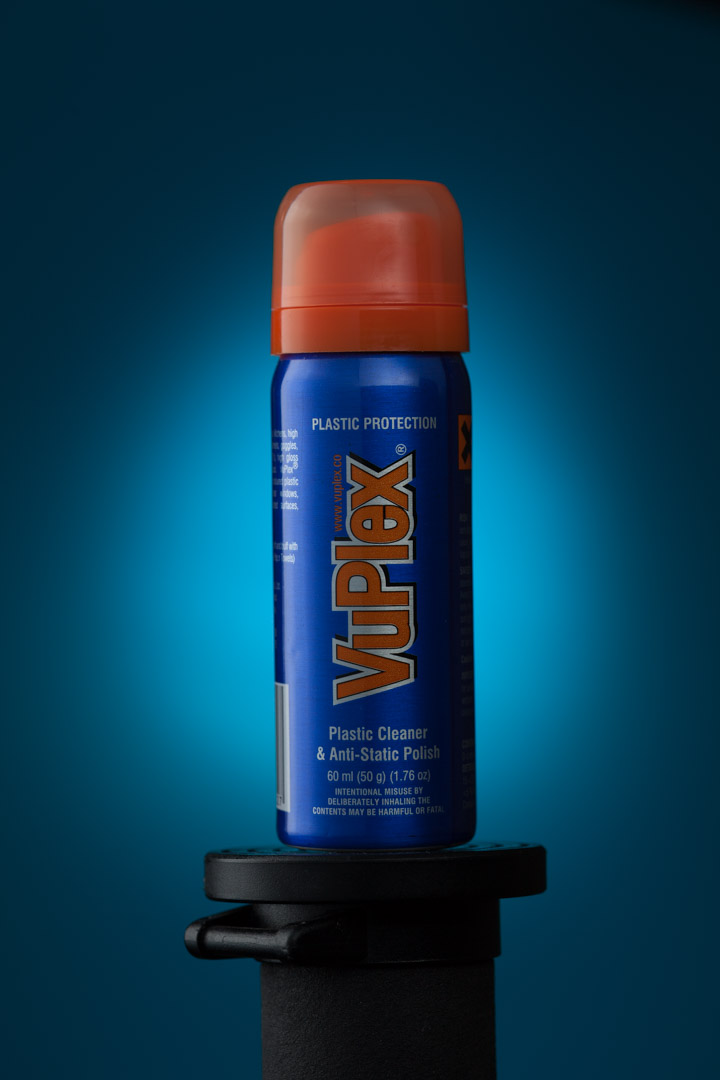
Here's some comparisons between the Godox softbox set up normally (as a softbox) and set up in the stripbox configuration. The box was angled into a diffusion panel on the left of the bottle. The idea in doing this is to create a smooth gradient instead of flat even lighting across the surface. This helps give the bottle more of a 3D effect.
In normal use you'd probably want the same setup on the right of the item as well. But since I only have one of these softboxes, and not enough stands or diffusers either, that wasn't possible for these examples.
Stripbox without front diffusion panel, flash at 1/8 power
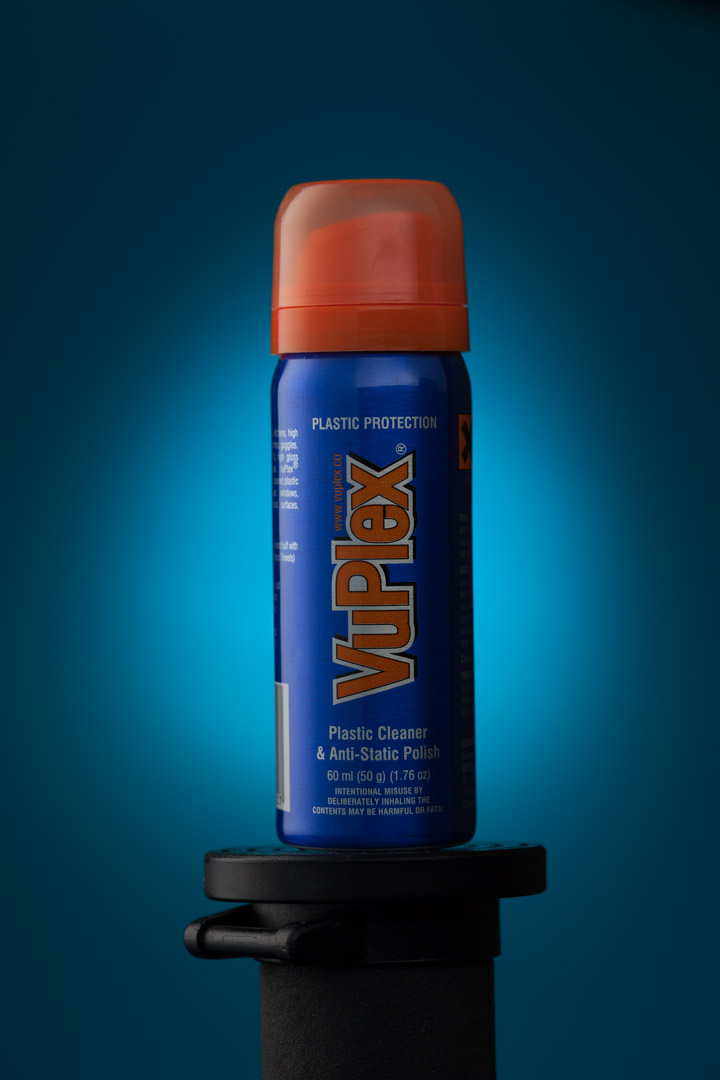
Stripbox with front diffusion panel, flash at 1/4 power
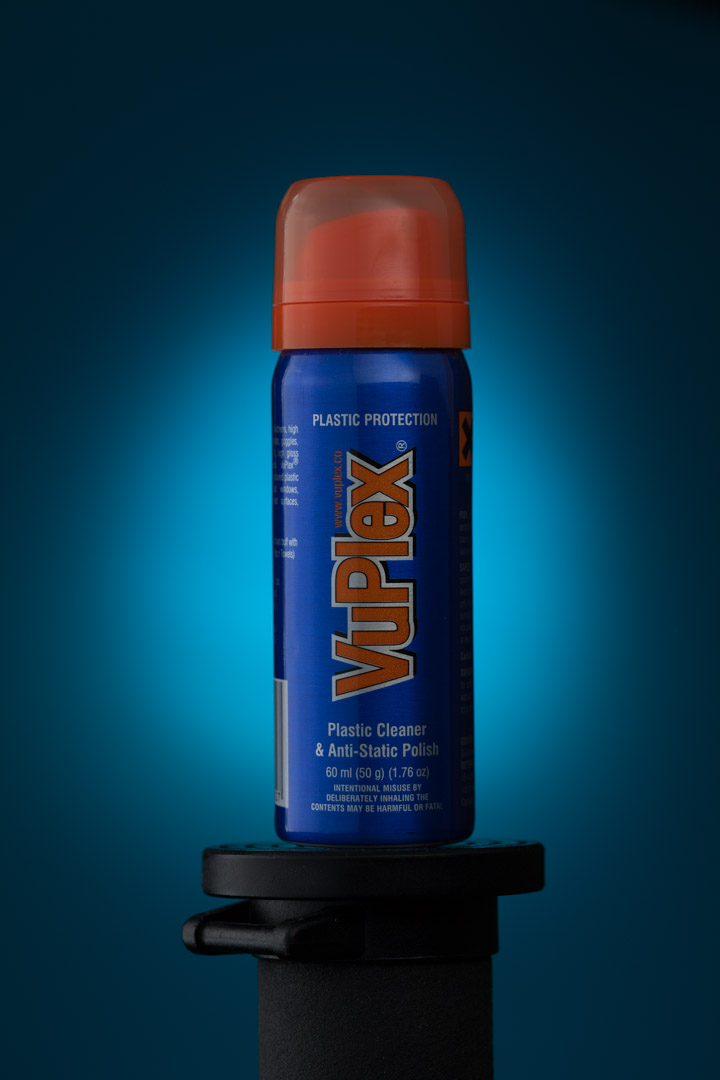
Softbox without front diffusion panel, flash at 1/16 power
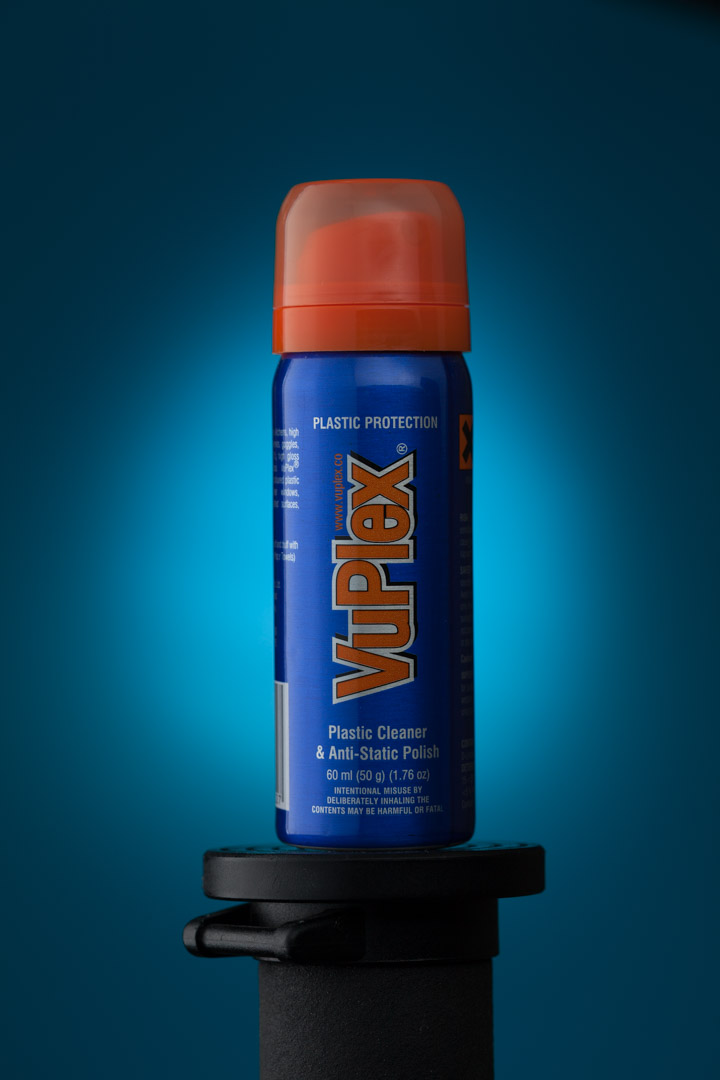
Softbox with front diffusion panel, flash at 1/8 power
As you can see, the narrower light of the stripbox works much better at creating a gradient across the left side of the bottle. Whereas the full softbox gives much flatter lighting on the bottle's surface.
Despite concentrating the light over a smaller area, the stripbox requires more power for the flash than the softbox for similar lighting. This isn't that surprising given all the creases in the interior of the stripbox.
The only other thing to note is that when shooting through a diffusion panel, as in this example, it seems the front diffusion panel for the softbox / stripbox is not really needed.
If you're after a softbox and stripbox but don't want to use both at the same time, then this could be a nice low cost solution. The umbrella design means it packs up nicely for storage and transport too. It's not likely to compare well to a proper stripbox. But for irregular use I think it's quite a reasonable solution.
Leave a Reply