I was recently contacted by René Lesseux about my review of the MPU-100 L plate bracket. René has constructed a very small and lightweight panorama adapter that makes use of the MPU-100 bracket for placing the camera in portrait orientation. I asked René if he would let me share the details of his panorama setup here, and he kindly agreed.
The setup is not designed for tilting the camera around the no parallax point (NPP), but rather rotating around the NPP for 360° (or less) cylindrical panoramas. Though it could be potentially be used for a full spherical panorama if you have a lens that covers 180° from top to bottom of the image.
Low weight and size is the main priority, rather than to be as sturdy as possible. It will handle a small camera (such as a Canon G1X or Fuji X100) fine, but may not be able to handle the weight of a larger camera such as a DSLR. I hope this post will be helpful for anyone looking for a small, lightweight, and low cost panorama head. I'll now hand over to René (click the images to view larger):

Pieces that make up the panorama head
- Redged RNB-0n ball head
- PU-40 QR plate
- Haoge CP39 QR clamp
- MPU-100 L bracket
- Metal piece from an adjustable bracket, nuts and washers
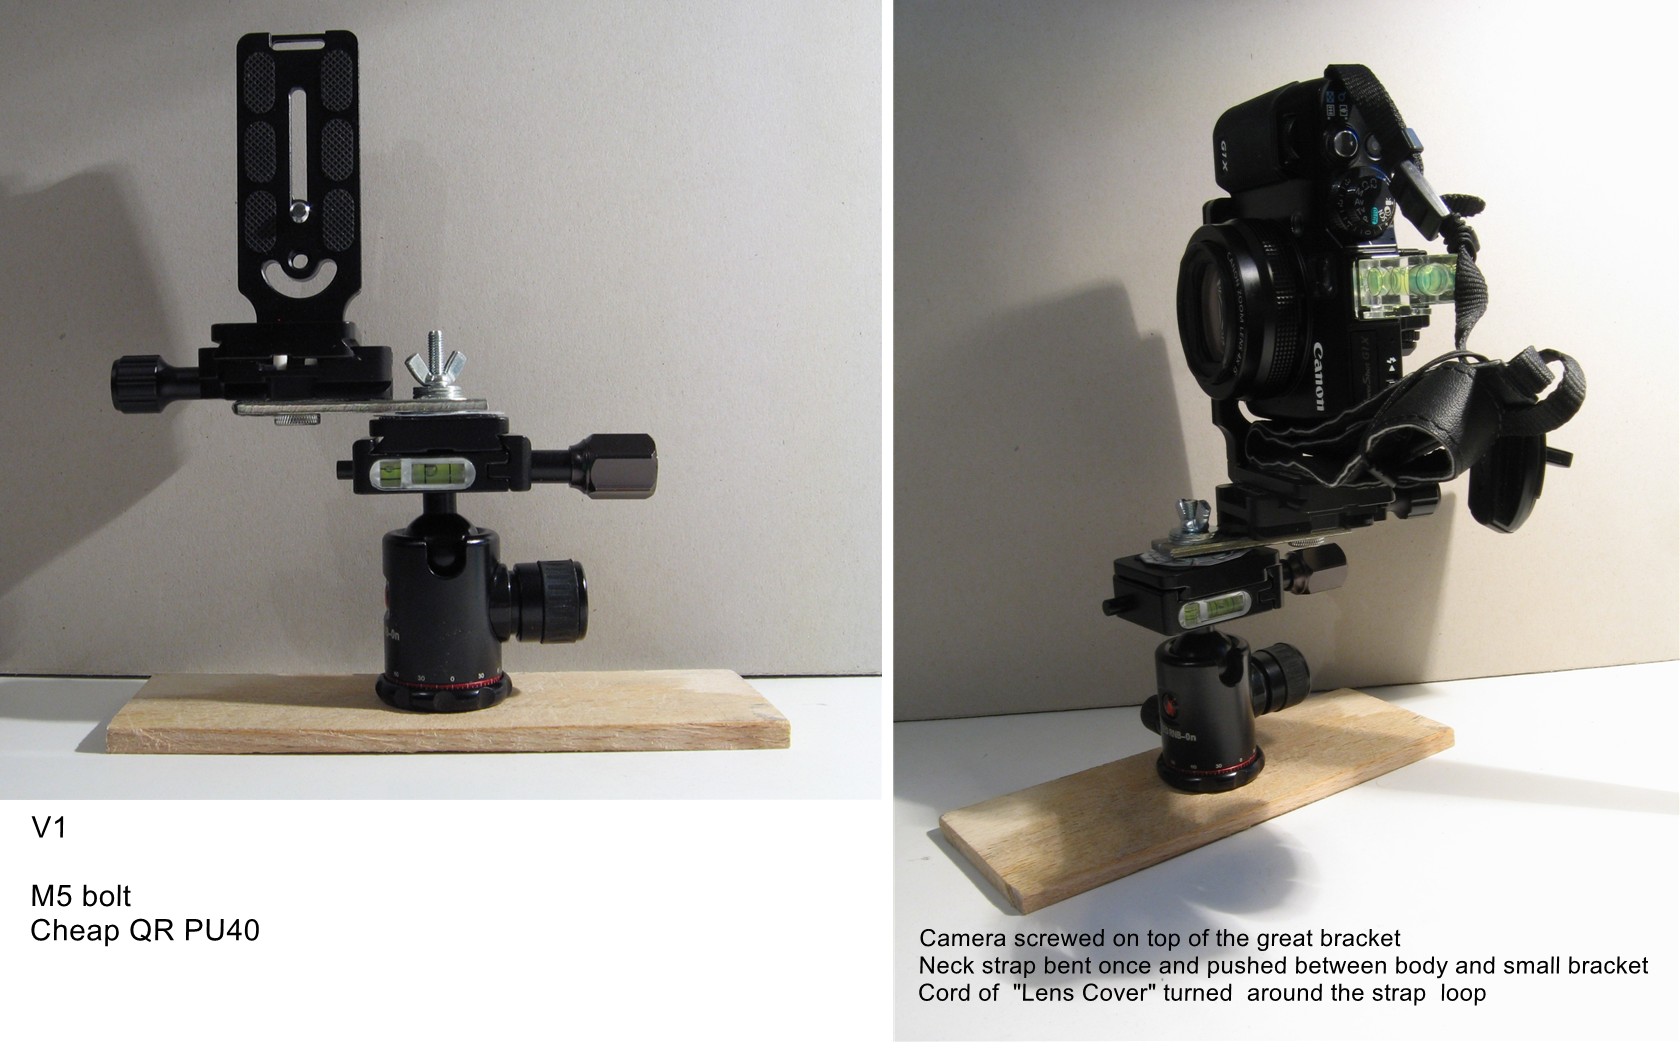
The L bracket on the rotator and my way to get rid of the ‘neck strap’
The first idea was to use the attachment on the clamp to fix a removable loop to attach the 'neck strap' but in practice it was not convenient. The better idea is to move the camera (in portrait mode) as high as possible and to push the 'pre-rolled' strap in the space created between the clamp and the body of the camera.

The rotator with the low cost PU 40 plate ($3 USD)
The bump around the bore of the plate's safety pin interferes with the safety pin of the Redged ball head's clamp - the plate is pushed 2 mm away out of the clamp when tightening. Not a problem to use it as such.
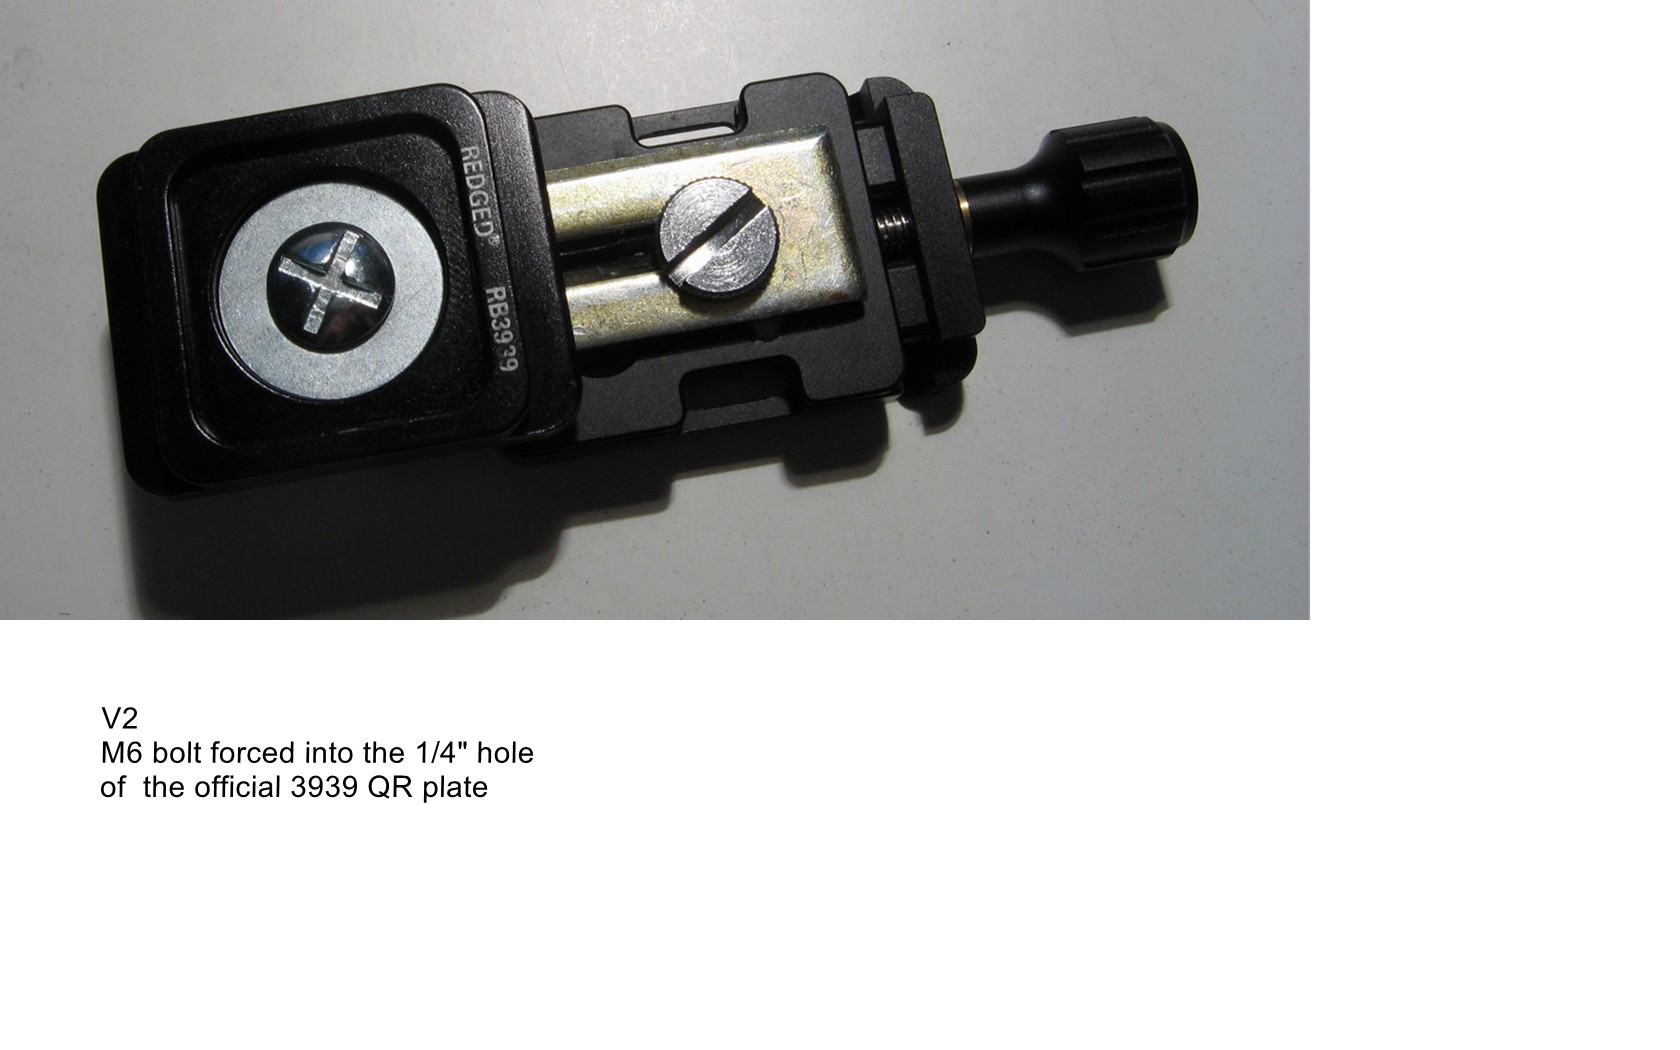
Same thing as above but using the official 3939 plate delivered with the RNB-0n ballhead
Notice the M6 washer perfectly fitting the round hole in the plate ($25 USD).
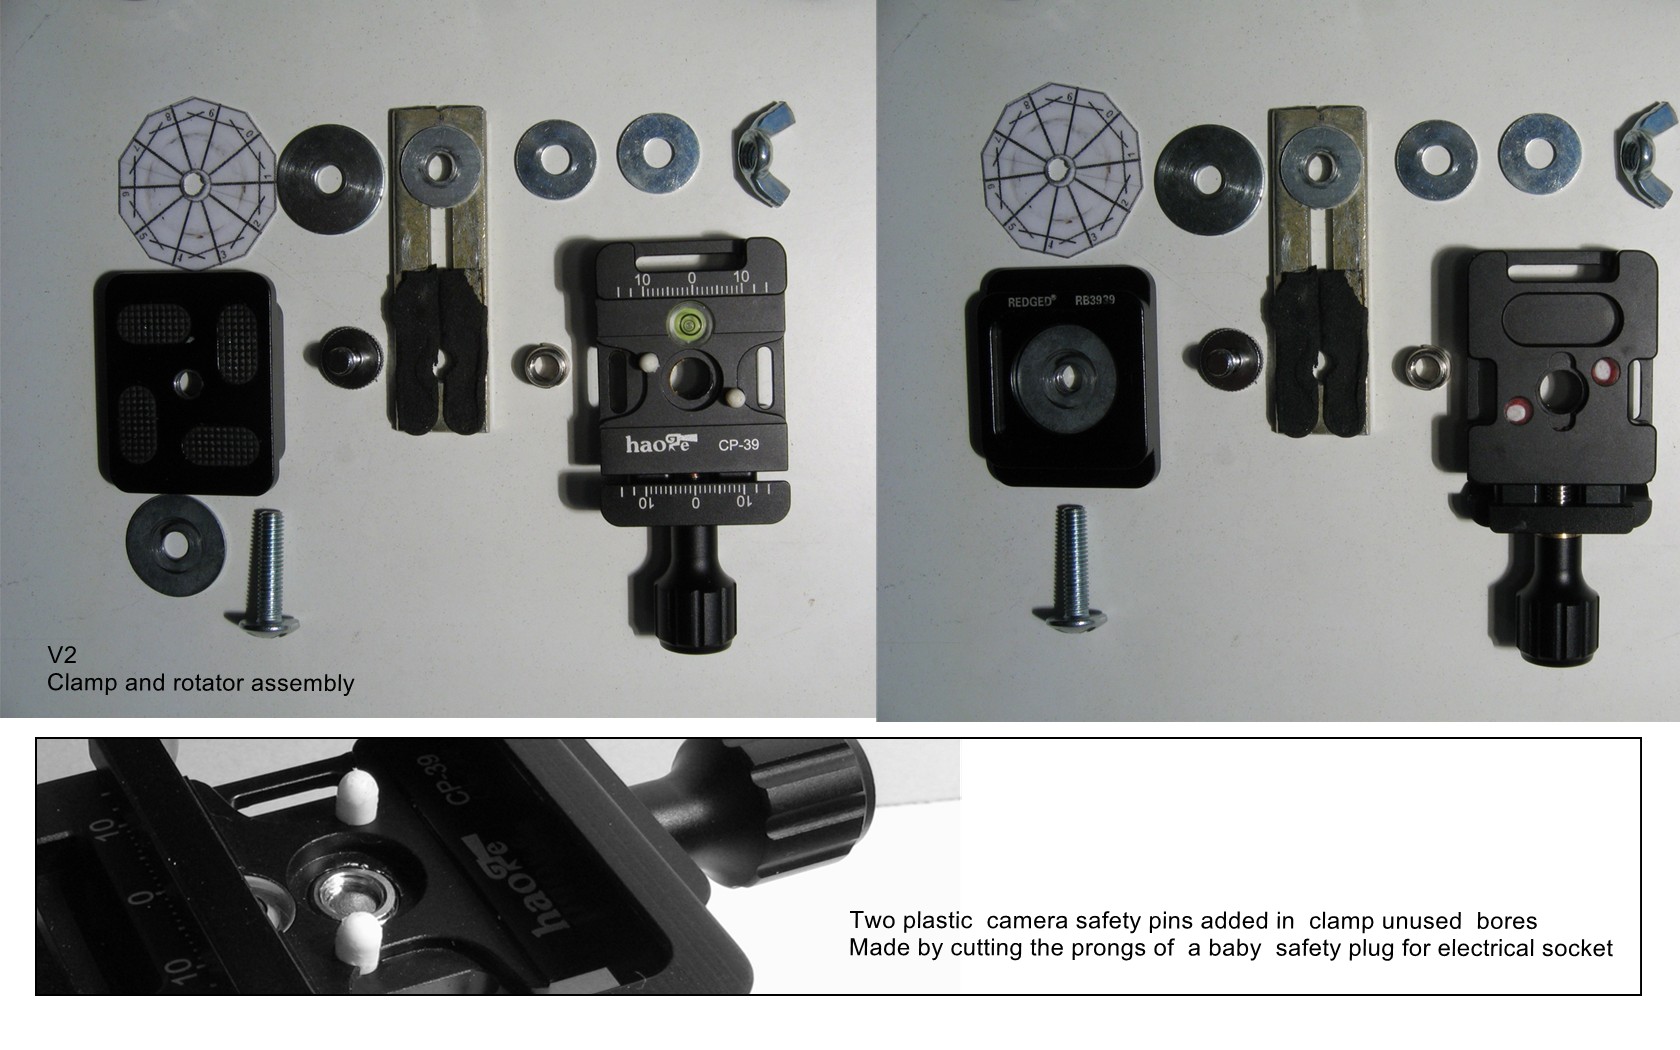
The rotator assembly
The metal piece that forms the horizontal arm of the rotator is cut from an adjustable bracket purchased from a hardware / DIY store. If you can't find this, for the cost, weight and rigidity, the best candidate is a cheap flash bracket with the rubber plate trimmed down or removed.
The safety screws of the L plate have been removed to allow positioning the camera on flat sufaces in landscape as well as in portrait orientation.
To secure the camera when the L plate is used for panorama safety pins must be added on the clamp.
The Haoge CP39 QR clamp has two traversing bores - 6 mm threaded going to 4 mm, not threaded at the top - perfectly suited to house such safety pins.

Red wax was pushed in the two 6 mm holes and two 4mm plastic prongs were sunk inside.
Thanks very much to René for sharing this information and all the photos that help show how it all goes together in practice. If you decide to make your own, just remember that you need to determine the correct placement of the QR clamp on the metal rail so that the camera is positioned at the No Parallax Point. If you're interested in a low weight, low cost, small size solution for cylindrical / partial panoramas, then I hope you found this post helpful.
Leave a Reply