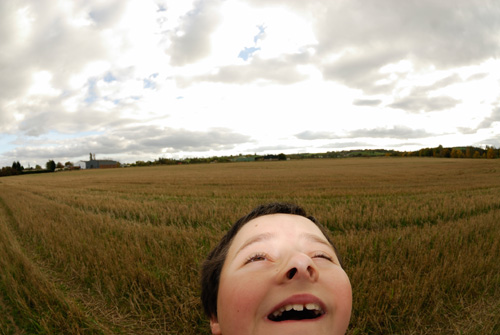
The other day I was looking through some photos from a few years ago, and I had quite a few fisheye portrait photos.
Now, I get the impression that most people don't like fisheye portrait photos, often dismissing them as gimmicky. However, while I would admit they are gimmicky, I quite like the effect. If nothing else, it's fun at least.
The specific setup I used for my fisheye portraits took quite a bit of experimenting to get 'right', so I thought I'd share the setup I used.
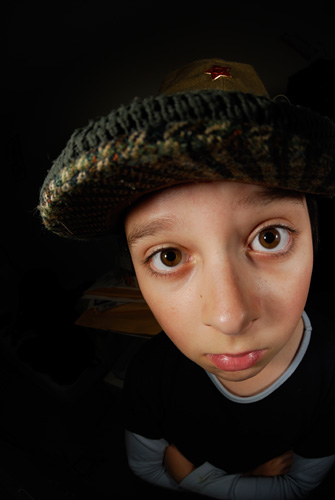
The main problem with using the fisheye as a portrait lens is that you have to get very close to your subject, sometimes sticking the lens just a few centimetres in front of their face. This will usually result in your subject's face not receiving a lot of light.
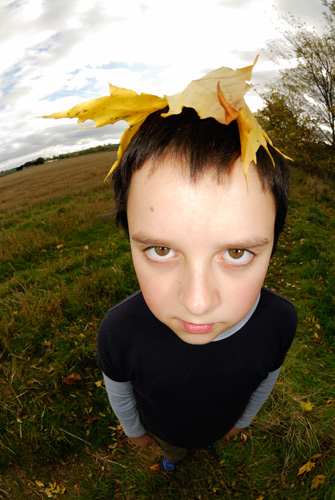
So you need to use some flash to add additional light to your subject's face. Unfortunately if you use the camera's pop-up flash, you'll end up with strange shadows cast by the nose. A single flash (speedlight) with a diffuser and either handheld or placed on a bracket can give better lighting.
But what I ended up with was a shoe-mounted flash (Nikon SB-800) with a puffer diffuser attached, and a secondary flash (another SB-800) positioned under the camera with a mini inflatable softbox. This was attached to the camera using a Wimberley shape shifter macro bracket.
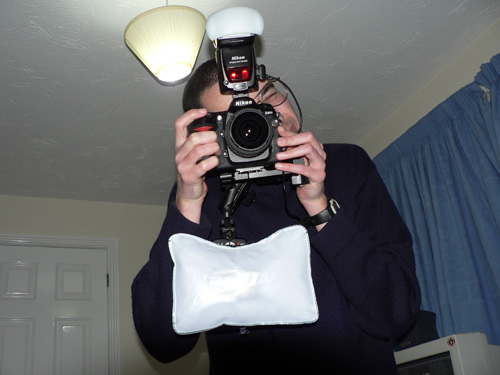
I found that the flash under the camera was not reliably triggered by the shoe mounted flash when using Nikon's infrared based wireless flash system. So the bottom flash is connected to the top one via a PC-sync cord, and both flashes put in manual mode.
Usually I would set the bottom flash at slightly lower power than the top flash. (I think, can't remember exactly after a few years since I last used this setup).
I expect that a ringflash adapter would work reasonably well for lighting fisheye portraits, but this setup was produced using only items I already had.
For taking photos indoors, you can easily end up with a black background. Due to the short distance of the flash to the subject and the relatively much larger distance of the flash to the background, the flash fall off is quite rapid. For the photo below I replaced one of the SB-800 flashes with a Sunpak flash, and then used the spare SB-800 in remote mode to bounce of the ceiling and light up the room.

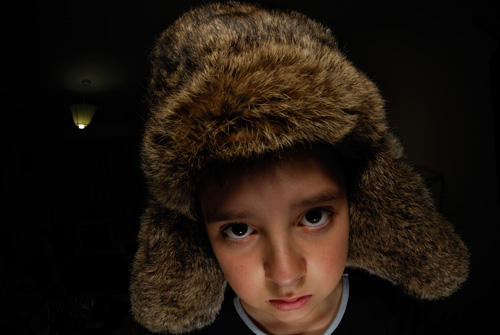
If you have a light source behind you, you need to be careful about your shadow falling on your subject. Either make sure your subject is completely in your shadow, or not in your shadow at all. Otherwise your subject will end up with a really bright spot on their face where it's lit by both ambient light and the flash.
The main problem with using flash for fisheye portraits is that you have to keep tweaking the settings depending on how far your subject is away from you. And if your subject is at more than one distance, e.g. reaching towards the lens with their hand, then you risk over-exposing the part near the camera, or underexposing the part further from the camera.
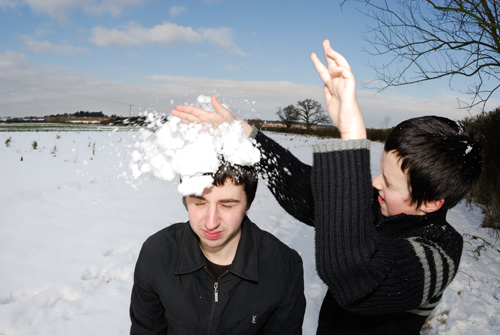
For example, in the photo above you can see the hand near the camera and the bits of snow moving towards the camera are over-exposed, while the rest of the photo is okay.
Leave a Reply