Isolating a product on a white background is something often used for catalogue-shot style product photography. It gives a clear uncluttered view of the product. Additionally the image can easily blend in with any page that uses a white background, making it suitable for use with articles and marketing material.
While it is ideal to capture a pure white background in-camera, in practice this can be quite tricky. It can be difficult to get the background all around the product blown out white without overexposing the product.
In this blog post I'm going to look at a few different ways you can take a nearly white background and make it pure white. I'll cover methods in both ACR (Adobe Camera RAW) and Photoshop.
Getting a pure white background in ACR
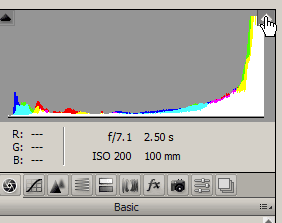
Clipping warning in ACR
The highlight clipping warning in ACR can be used to easily see whether the background of the image is blown out pure white, or just nearly white. Bear in mind that a pure white background will blend in seamlessly with a white page, while a nearly white background will have a visible edge. This is why it is important to check the background is pure white.
To the top right of the histogram in ACR, there will be a little white triangle. Click this, and it will turn the highlight clipping warning on. When it is switched on, there will be a thin white border around the icon.
Turning highlight clipping warning on in ACR

Image in ACR with highlight clipping warning turned on, showing clipped areas as bright red
With highlight clipping enabled, any areas blown out will appear as red in the image. Now, there is a caveat to ACR's highlight clipping warning. It will will highlight any areas that are blown out in a single channel (Red, green, or blue).
So it is possible that your background might show as being blown out, when actually it is only blown out in one or two channels, rather than all three. It might also show areas of your subject as blown out (particularly if it is strongly coloured), when it is just a single channel that is clipping. Unfortunately it does not seem that this is adjustable either. However, it is still a pretty good way to check whether the background is blown out.
Blowing out the background in ACR
If you can see an area of the image that should be pure white, but is not showing up in the highlight clipping warning, you can use the adjustment brush to blow it out. You want to use the brush to add positive exposure compensation to those areas that are not pure white but should be.
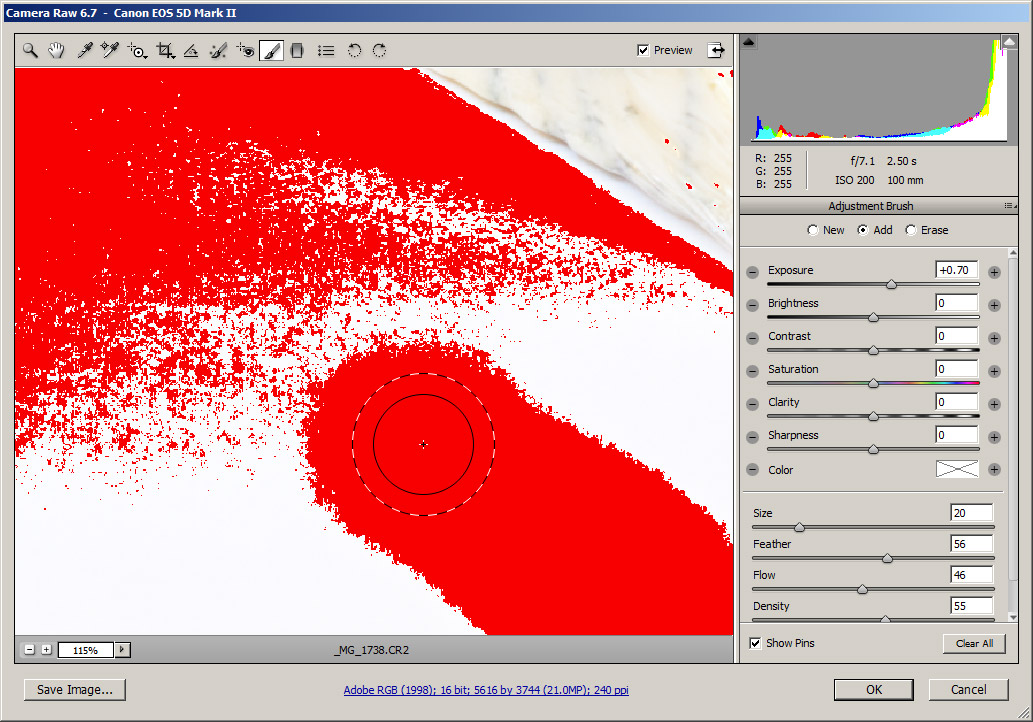
Using the adjustment brush to increase the exposure of the background and blow it out to pure white
The exact amount of exposure needed depends on how near pure white the area to be adjusted already is. If it's nearly white, just use a small amount of exposure. If it's quite dark, then it will require a larger amount.
The good thing about the adjustment brush is that you can easily change the setting for the brush after already having used it. So if you painted an area, but it still didn't blow out, you can just increase the exposure setting of the brush until it does.
Bear in mind that you can also make multiple passes by brushing an area once, then selecting 'New' at the top of the brush settings, and brushing the area again.
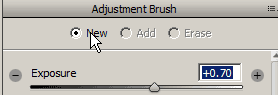
Adding a new adjustment brush pass in ACR
Getting a pure white background in Photoshop
Threshold adjustment in Photoshop
To check whether an area is blown out pure white in Photoshop you can use the Threshold adjustment layer. Create a new Threshold adjustment layer, then in the adjustments panel you can slide the threshold level all the way to the right.
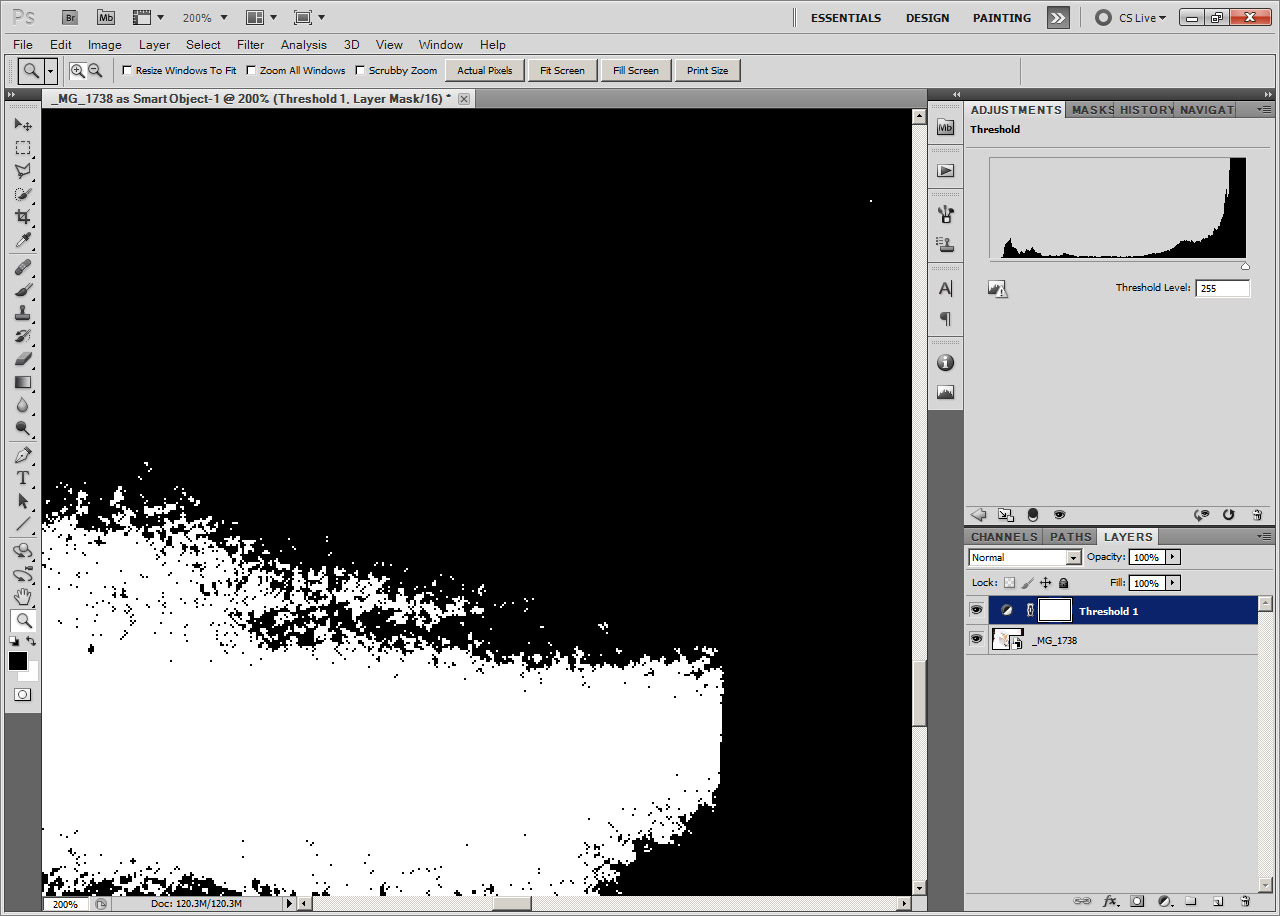
Threshold adjustment layer in Photoshop set to a threshold level of 255 (pure white)
This will make it so that anything pure white in the image shows up as white, while anything less than pure white shows up as black. I wouldn't advise leaving the threshold layer visible while trying to blow out areas that should be white, since you can't actually see your image with it visible. But it is useful for switching on and off and checking you have achieved pure white.

Threshold adjustment layer opacity reduced to 50% to show some detail in the underlying layer
Blowing out the background with curves
One method to achieve a clean white background in Photoshop is the curves adjustment layer. After creating the curves layer, in the adjustment panel move the white point of the curve inwards until you are clipping all the areas that you want white. Generally there will be a peak of near-white in the histogram that you need to move the white point in past.

Curves adjustment used to blow out background to white, with Threshold adjustment visible at 50% opacity
Don't worry if you start clipping some highlight detail on the subject. You can use the layer mask for the layer to remove (or lessen) the effect of the adjustment by painting out the subject. Or use a black mask and just paint in the adjustment where needed.

Curves adjustment used to blow out background to white, with mask used to remove effect from subject (and Threshold adjustment hidden)
Using a white colour layer
Another method is to use a colour adjustment layer, with white chosen as the colour. After creating the layer, click on the layer mask to select it. Then press Ctrl + I / Cmd + I to invert the mask to black. Paint white on the mask in the areas of the image that should be pure white.

White colour adjustment layer masked in to make the background pure white, with Threshold adjustment visible at 50% opacity

White colour adjustment layer masked in to make the background pure white (with Threshold adjustment hidden)
Or you could just paint white on a standard layer for the same effect. The reason I prefer using a mask with a colour adjustment layer is that I can easily change from painting white to removing the white (if I make a mistake). I just need to switch from white to black paint (x on the keyboard to switch between foreground and background colours). With painting white on a standard layer, you need to switch to the eraser tool to remove the white. I just find using a layer mask easier.
Blowing out white with the Dodge tool
The Dodge tool can be used in some situations to increase the exposure on the background. However, it is one I use very rarely. The main reason is that you require a good difference in tonal values between the area that you want pure white, and the area that you want left as-is (the product).
For a black product on a background you want to be white, the Dodge tool would probably work well. But for most subjects you'll end up increasing the exposure around the edge of the subject as well as the background. In which case, you might as well just use a white colour layer.
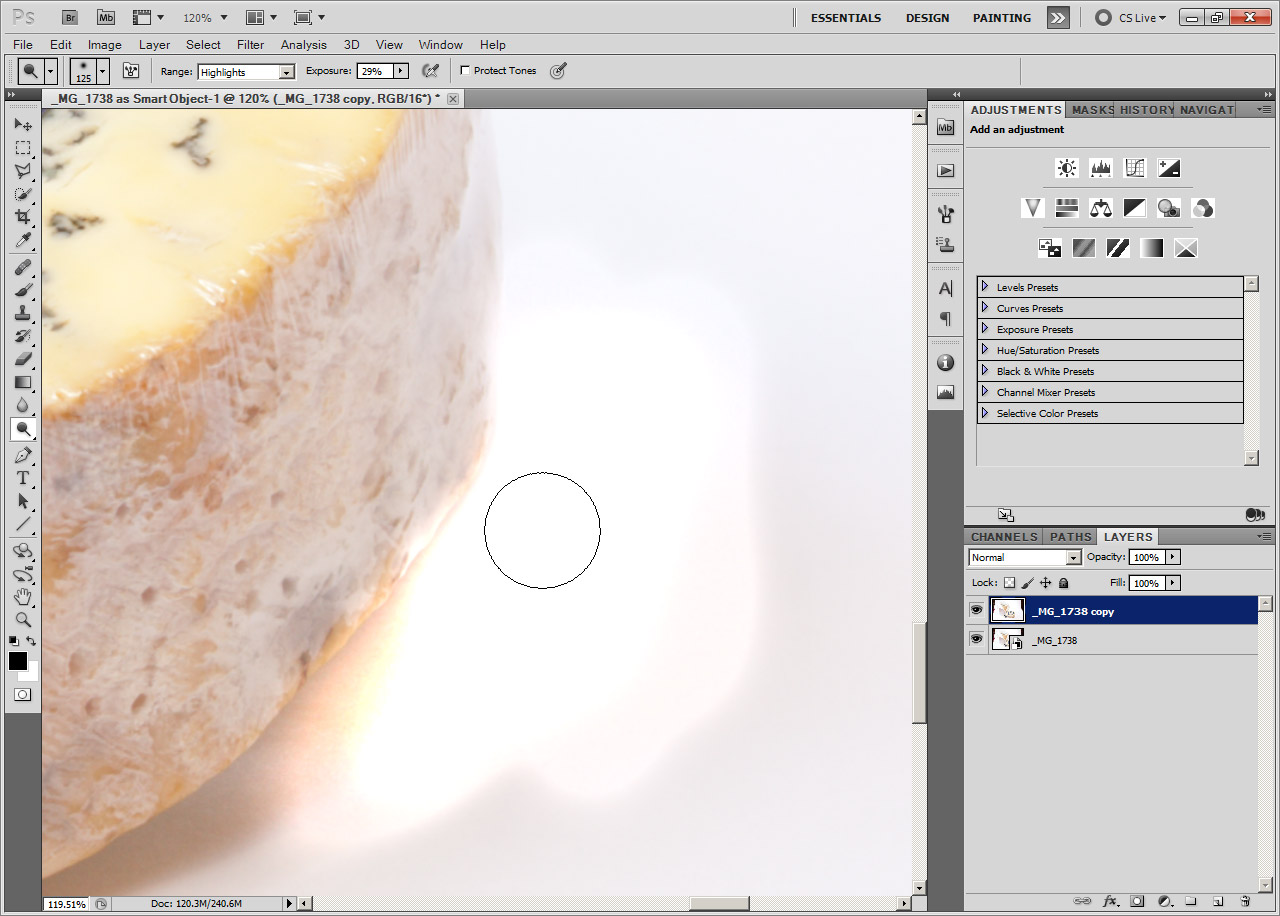
Using the dodge tool to blow out the background white - note how part of the cheese is blown out where the tool was painted over
Another issue is that it only works on the current layer. I like working with a RAW opened in Photoshop as a Smart Object, which the dodge tool won't work on - it will only work on a rasterized layer.
However, it is worth being aware of the dodge tool, and you may find it useful in some situations. (I use the dodge and burn tools sometimes when working on layer masks for exposure blending).
I hope this has given you a few ideas of how to achieve a pure white background from a nearly white background. Personally I prefer using the curves and colour adjustment layers (sometimes in combination), with the Threshold tool in Photoshop to check that the background really is pure white.
Leave a Reply