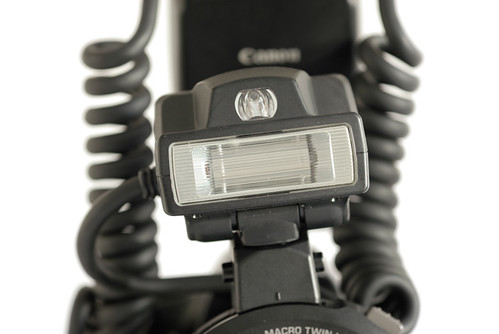
With true macro photography, it is often necessary to use flash, especially when photographing moving subjects like insects.
However, getting nice light from flash without harsh highlights isn't easy, so it's important to diffuse the flash to soften the highlights as much as possible. In April SteB designed some new diffusers for the Canon MT-24EX Macro Twin Flash (which I use) that have a concave design. He described them and posted some comparison shots on the Juza Nature Photography Forum: Concave Flash Diffuser Test.
Also mentioned on that thread is a 'light tent' diffuser, which seemed to produce excellent results as well. Although I was happy with my current diffusers for the MT-24EX when I used them last year, this year they didn't seem to be working very well (not sure how that could happen though). So I decided to try making the concave diffusers and light tent diffuser to see how well they compared to my current MT-24EX diffusers.
So after purchasing the needed materials, I set about making the diffusers. For the concave diffusers I used the caps of a Dove Invisible Dry Stick deodorant and a Boots Roll-on deodorant. For the light tent I used Vellum paper and a drink bottle.

After making the diffusers, I needed to try and find a suitable subject to test them on, like a shiny beetle. While I was able to find various beetles, I wasn't able to find any that would stay still and allow me to compare the concave diffusers and light tent against my old diffusers.
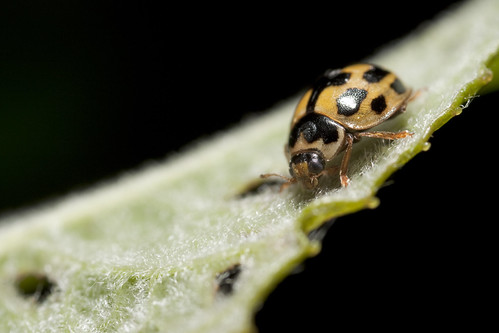
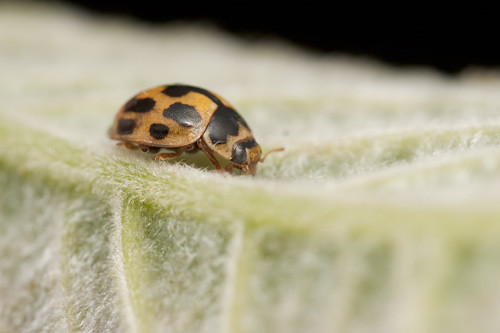
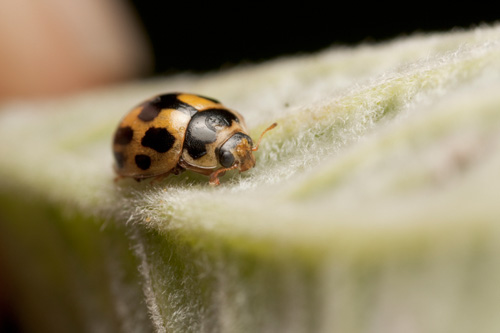
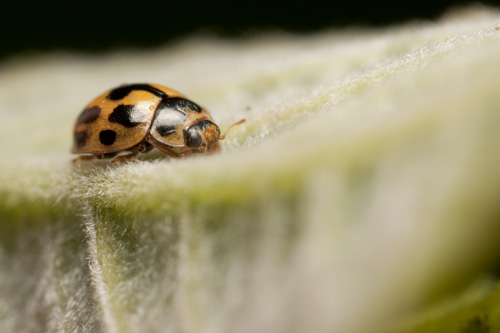
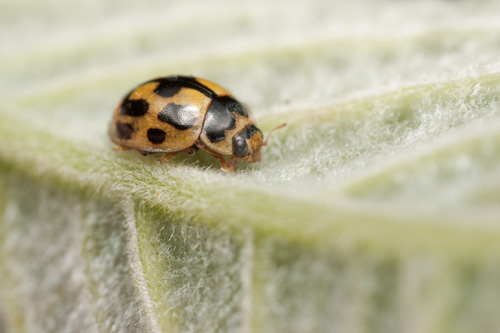
However, a few days ago, I managed to find a 14-spotted ladybird (Propylea quatuordecimpunctata) who was quite co-operative. My tests weren't exactly scientific - I shot handheld so the angle varies between shots, and near the end of the tests the ladybird decided to move about a bit, but I think it still gives a good comparison between the different diffusers for the MT-24EX that I tested.
The test setup
The different diffusers I tested were: Light tent; Dove Concave diffuser; Boots Concave diffuser; my old main diffuser (Home-made mk. II); my old side/fill diffuser (Home-made mk. III); and the bare flash head with no diffusion. I didn't test my Home-made mk. I diffusers or the Puffer diffusers, partly because the ladybird disappeared, and partly because I had found these not to be as good as my Home-made mk. II or III diffusers in previous tests.
When testing I tried to equalize the lighting of the image, using the MT-24EX in manual mode, and adjusting the flash power as necessary. Unfortunately the MT-24EX only allows adjusting the flash power in full stops when in manual mode, and so for the Home-made mk. II diffuser I applied -0.65 exposure compensation when converting from RAW to try and equalize it with the other images. All the other images have had -0.35 exposure compensation applied in RAW conversion.
For the tests only one flash head was fired, with the flash head being in the 12 o'clock position. For the concave diffusers, they were additionally mounted on a Kaiser adjustable flash shoe to elevate them more above the subject. The images were converted using Adobe Camera Raw 5.6 with default settings except for the exposure compensation, and the tone curve, which was changed to a straight diagonal instead of the normal 'medium contrast' surve.
The images were shot at 2:1 magnification using the Canon MP-E 65mm/2.8 1-5x Macro lens on a Canon EOS 450D, and of course with the Canon MT-24EX Macro Twin Flash. The higher the magnification, the larger the apparent light size, and so the better the diffusion. Since I wanted to test the abilities of the diffusers, I wanted to try and go for a 'worst case scenario'. 1:1 magnification would have been the best test of the diffusers, but due to the small size of the ladybird, I felt 2:1 was the minimum magnification I could use for the tests.
The diffusers
So here are the different MT-24EX diffusers I tested:
Bare flash
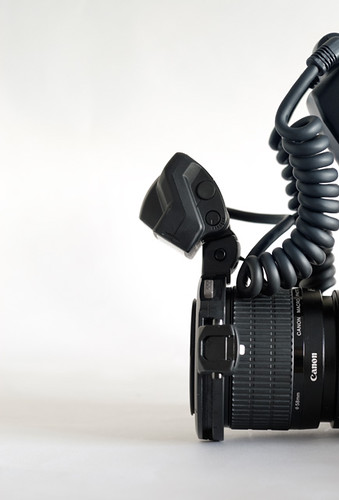
Well, not a lot to say about the bare flash really. The bare flash doesn't stick out from the front of the camera much. Sometimes it is only possible to get a shot using the bare flash as diffusers can stick out too much and make it so you can't get a subject in focus when shooting at high magnification against something like a wall or pavement. That's about the only good point of using the MT-24EX without diffusers.
Light tent diffuser
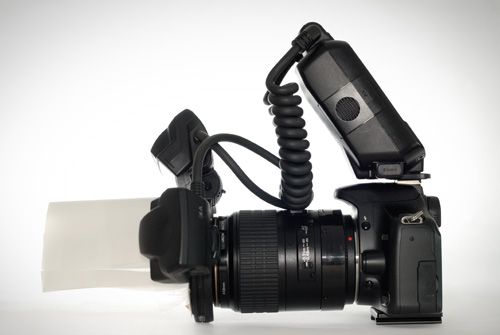
The light tent diffuser is two pieces of Vellum paper kept about 20mm apart, and mounted on the end of the MT-24EX flash ring that attaches to the end of the lens. The diffuser is large enough so that the flash heads can be positioned 90° apart while still both shooting through the diffuser.
The main problem with the diffuser when using it with the MT-24EX and MP-E lens is that because it sticks out quite far, it can knock against the plant that the insect you're trying to photograph is on, and scare the insect off or move it out of focus. In some cases e.g. shooting against a wall, it is not possible to use the light tent diffuser at all because it sticks out too far.
Another problem with the light tent diffuser is that it can easily get crushed and messed up when kept in your camera bag.
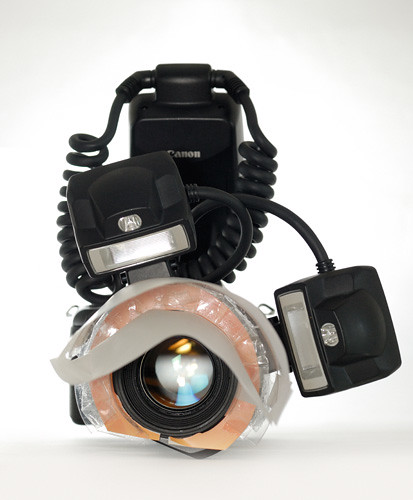
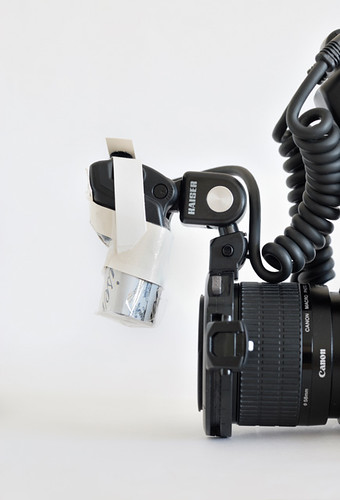
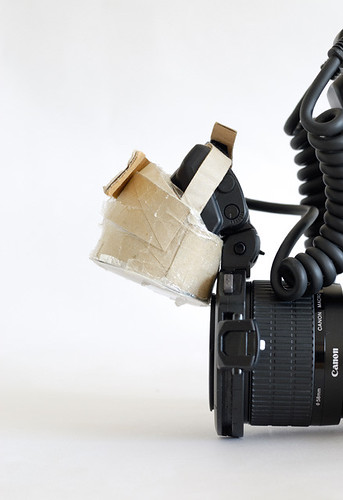
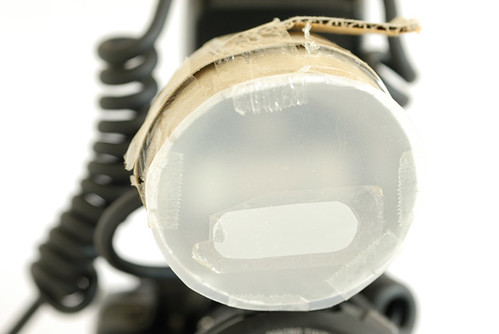
Boots Concave diffuser
The Boots Concave diffuser is made from white card and a Boots roll on deodorant cap, positioned with the rounded end of the cap up against the flash head. The diffuser is fronted with a piece of Vellum paper.
The flash head with diffuser attached was mounted on a Kaiser Adjustable Flash Shoe to elevate it above the subject.
The long length of the diffuser means that the end is positioned relatively close to the subject, making for a larger apparent light size (and so better diffusion). But the large size means it is also more likely to knock against the plant the insect you're trying to photograph is on.
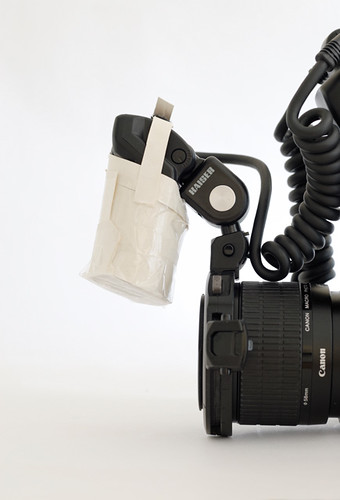
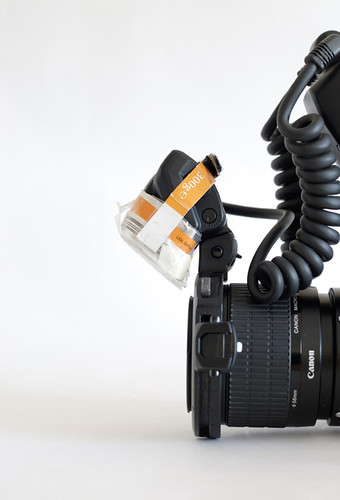
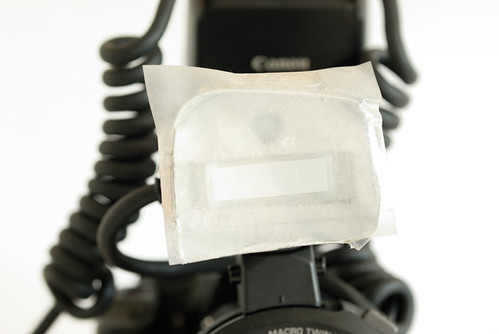
Dove Concave diffuser
This diffuser was made from a Dove Invisible Dry stick deodorant cap, a drinks can, and some card. The deodorant cap is positioned inside the diffuser so that the rounded end is against the MT-24EX's flash head. It is fronted with a piece of Vellum paper.
The flash head was mounted on a Kaiser Adjustable Flash Shoe to elevate it above the subject.
The Dove deodorant cap diffuser is quite a bit smaller in length and height compared to the Boots deodorant cap diffuser. The Dove deodorant cap is also much more opaque than the Boots deodorant cap (which is transparent), resulting in about 1 stop of light loss compared to the Boots.
Home-made mk. II diffuser
This is my large main diffuser for the MT-24EX that I used most of last year. This diffuser is made with foil coated toilet roll with a round opening, fronted with a piece cut from a YongNuo External Flash Diffuser, and a smaller piece of Lee 216 White diffusion.
The diffuser is designed with a longer top than bottom, so as to force more light down onto the subject. The round shape of the diffuser is intended to create a more natural looking rounded highlight than the rectangular shape of a bare flash head.
Home-made mk. III diffuser
This is my third generation home-made diffuser, but I found it didn't diffuse the flash as well as my second generation home-made diffuser. However, due to its small size, for the last year or so I have used it as the diffuser on the flash head that I normally have positioned at 3 or 9 o' clock - the 2nd generation diffuser I used before was too big and kept knocking into the plants the insects I was trying to photograph were perching on.
This small diffuser is made from card and covered inside with aluminium foil. It is fronted with Lee 253 Hampshire Frost and a smaller piece of Lee 216 White diffusion, designed to diffuse the 'hot-spot' of the flash. The bottom of the diffuser has a downwards lip to ensure good flash coverage at the closest focus distance of Canon's MP-E Macro lens.
The test results
And so here are the test results with each diffuser setup:
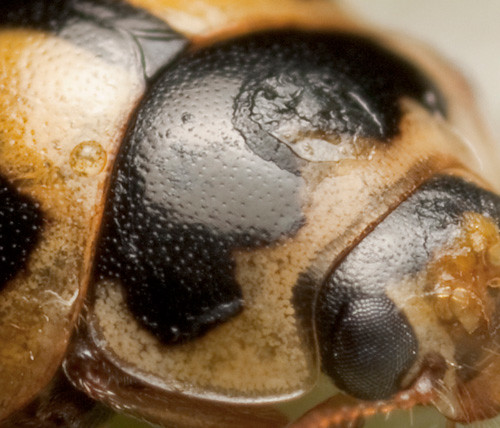
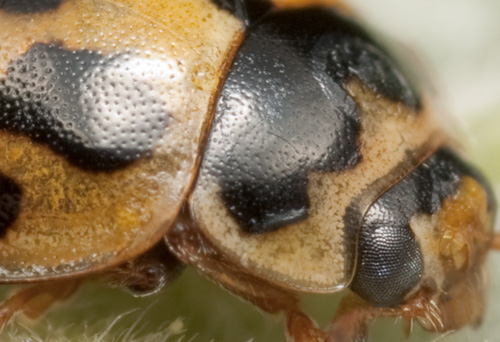
Bare flash
Crop:
Flash power: 1/32
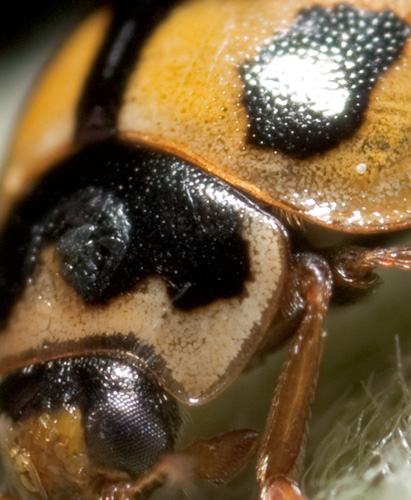
Although they do a good job of lighting the image, the bare flash head(s) of the MT-24EX produce harsh highlights and a large blown out area with no details.
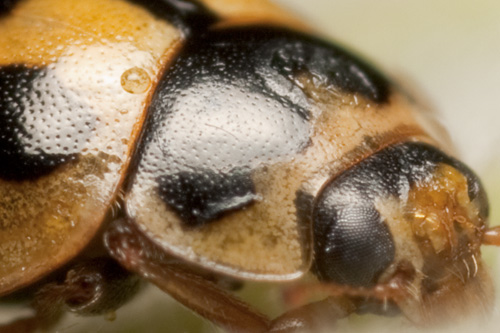
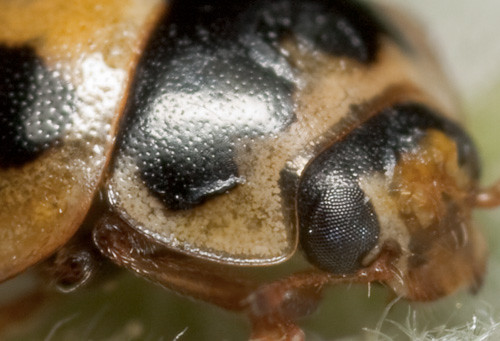
Light tent diffuser
Crop:

Flash power: 1/16
Probably the best diffuser I tested, the light tent diffuser produces nice even highlights, with no loss of detail. It does have a stop of light loss compared to the bare flash though. The image is relatively low contrast, but this can be fixed easily by applying a contrasty tone curve.
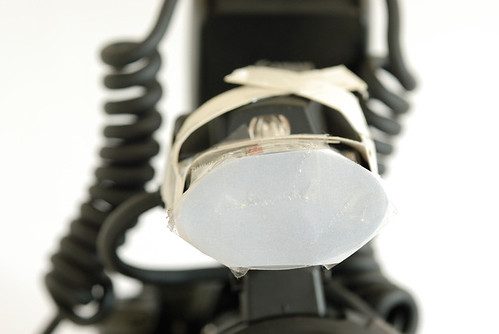
Boots Concave diffuser
Crop:
Flash power: 1/32
Not quite as good as the Light tent diffuser, nevertheless the Concave diffuser using the Boots roll-on deodorant cap does a very good job of diffusing the MT-24EX flash, with virtually no loss of detail and no loss of light compared to the bare flash.
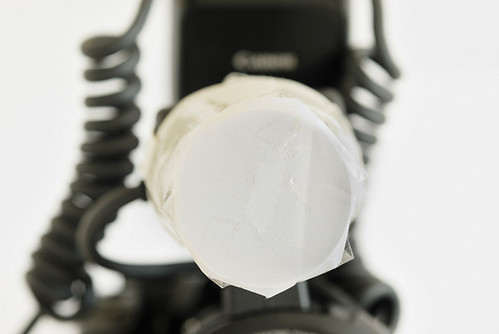
Dove Concave diffuser
Crop:
Flash power: 1/16
Very close result to the Boots Concave diffuser. Due to the Dove deodorant cap being relatively opaque, a stop of light is lost compared to the bare flash.
Home-made mk. II large diffuser
Crop:
Flash power: ~1/48
Quite a good result, but there is a small hotspot where some detail is being lost. Because the design of this diffuser channels the light down onto the subject and the diffusion material is quite transparent, we actually gain 1/3 stop light compared to the bare flash.
Home-made mk. III diffuser

Crop:
Flash power: 1/32
Diffusion is much better than the bare flash, but not very good compared to the other diffusers.
Conclusions
SteB's concave diffuser design obviously works very well. And the light tent design works even better. Based on these results, when using the MP-E 65mm lens with the MT-24EX Macro Twin Flash, I will use the light tent diffuser as my primary means of diffusing the flash. If I find that the light tent is causing problems knocking into the plant an insect is on, then I will instead use the Boots concave diffuser (probably with the Kaiser adjustable flash shoe) as my main diffuser, and the Dove concave diffuser on the other flash head used for side fill.
Thanks for this article as your dedication is quite obvious as it takes much time to develop and perfect this technique. I personally have found the ring that comes with the MT 24EX was problematic and restrictive and like you was attempting to find ways to avoid the harshness of the bare flash. In seeking alternate options beyond diffusing & manual exposure – FEC and diffusers with cotton, I have found the Dual Flash Macro Holder works quite well (keyword search ebay). Outside of attaching this holder on the camera body, if your camera has wireless then the MT 24EX can be mounted with the above holder on a tripod for additional freedom and lesser camera weight – thanks again for your invaluable tips.
Handy article for extreme macro types, should help the Canon guys heaps. I have lost count of the number of DIY diffusers I’ve made 🙂