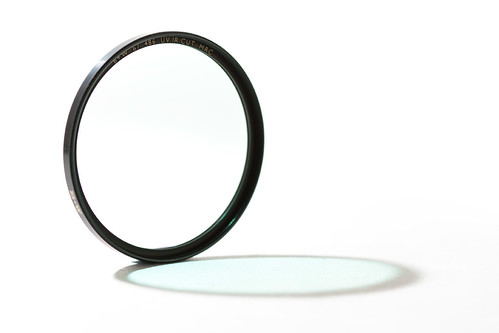
Because the Fuji IS Pro DSLR is sensitive to infrared and ultraviolet light as well as visible light, if you want to take 'normal' photos using just visible light, you will need a filter that blocks the infrared and ultraviolet light. The filter I purchased was the B+W 486 UV-IR Cut Filter.
Using the filter
The B+W 486 UV-IR Cut filter is quite reflective, reflecting a bit of red light. So you have to be careful when mounting it on your lens on a sunny day to prevent reflecting light into your eyes. And in use you should probably try and be careful not to reflect light into others' eyes.

Cyan vignetting
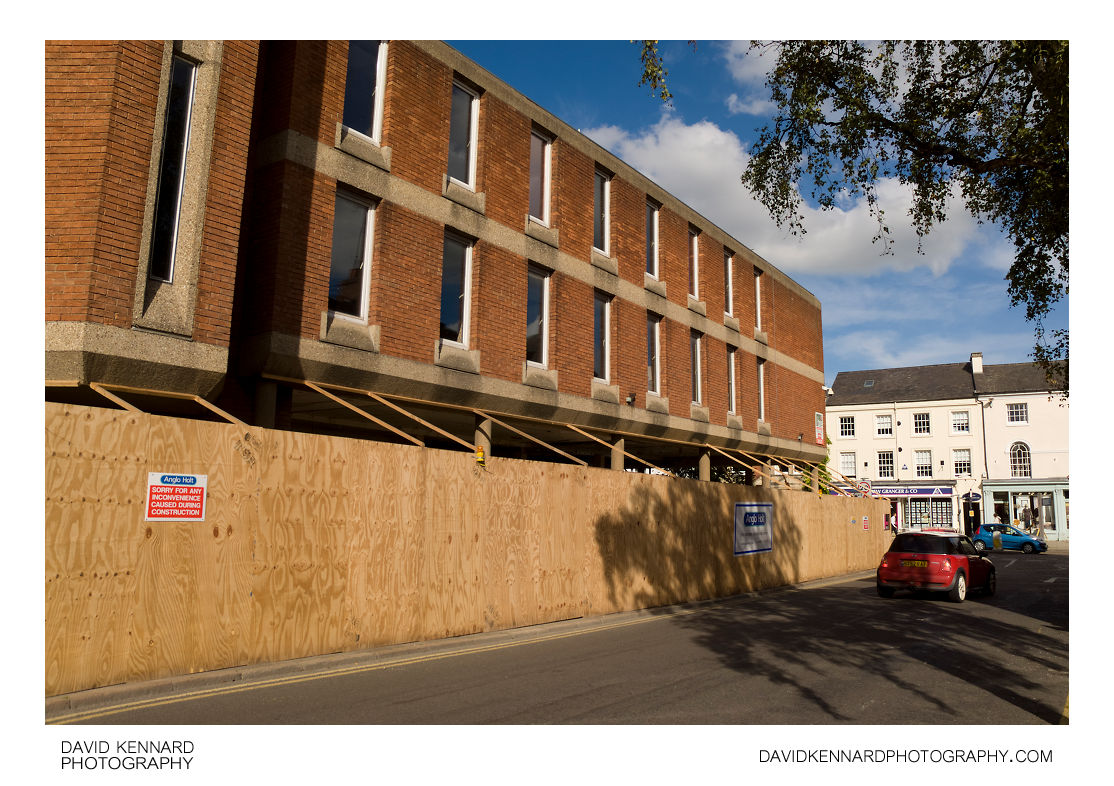
The main problem with the B+W 486 UV-IR Cut filter (other than the cost) is that at wider angles you will get a green-cyan vignette effect around the edges of the image. According to B+W, this effect is likely to be visible on any lens with an angle of view of more than 60°.
This means lenses with a focal length less than about 20mm on a DSLR with an APS-C sized sensor, or 31mm on a DSLR with a full frame sensor will exhibit the green-cyan vignette effect when used with the B+W 486 UV-IR Cut filter. As far as I'm aware, this problem is not exclusive to the B+W 486, and is a problem for all UV-IR cut filters.
Here's an explanation of the problem from B+W's website:
Please note however that, in contrast to mass-colored (integrally colored) filter glass, the UV-IR barrier filter is based on thin-film technology. More than 30 interference coatings are vapor-deposited on one side, while the opposite side is MRC-coated. In wide-angle lenses, the laws of physics lead to shallower incidence angles for peripheral rays. For geometric reasons these rays have to travel further through the interference coatings than rays traveling vertically through the coatings in the centre of the lens. With increasing angle of incidence, this leads to a change in light color towards blue. This effect can clearly be seen by looking at an UV-IR barrier filter from an angle. The color of the reflected light changes, with a similar effect on the light traveling through the filter.
The green-cyan vignetting isn't very nice, but thankfully there is a free program called CornerFix that can be used to remove it.

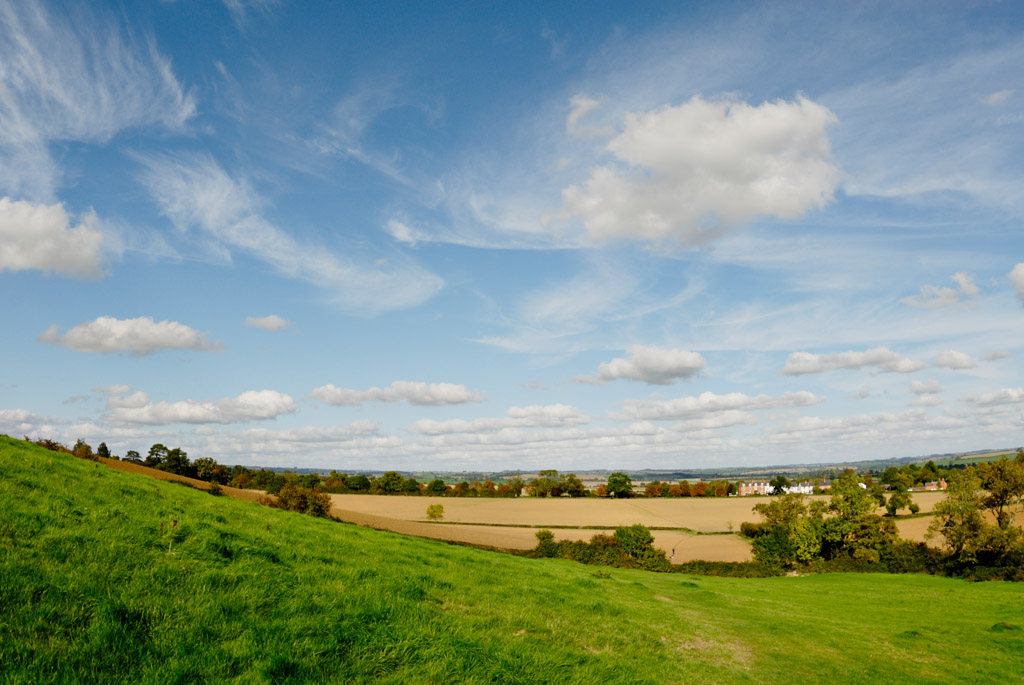
Before CornerFix
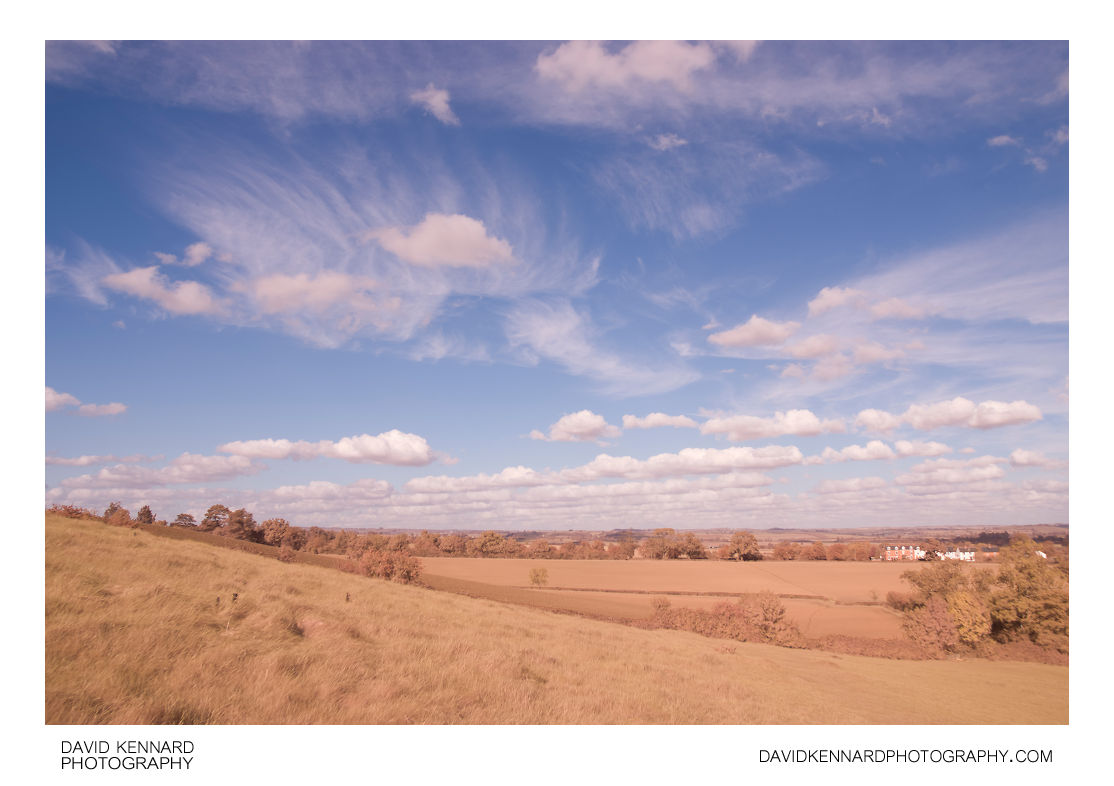
After CornerFix
Using CornerFix to remove the Cyan vignetting
To use CornerFix to remove the green-cyan vignetting caused by using the B+W 486 UV-IR Cut filter with the Fuji IS Pro is relatively simple, though it does add a few more steps to my normal workflow.
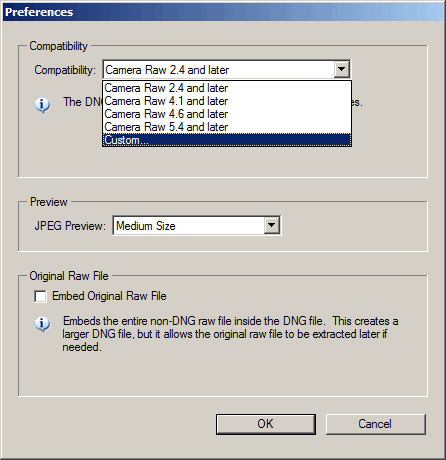
First you'll need the Adobe DNG Converter. When the DNG converter is installed, open it and click on the 'Change Preferences' button.

In the preferences window that opens up, click on the Compatibility drop down list and choose 'Custom...'.
Then tick the 'Linear (demosaiced)' checkbox and press 'OK'.
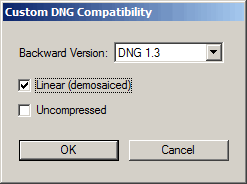
Press 'OK' on the preferences window as well, and you can now use the Adobe DNG Converter to convert your Fuji IS Pro RAF files to DNGs suitable for use with CornerFix.
CornerFix requires a reference photo to remove the green-cyan vignette cast from the photos. This is just a case of taking a photo of a white piece of card with the UV IR Cut filter and the lens and camera at the same settings used to take the images you want to fix.
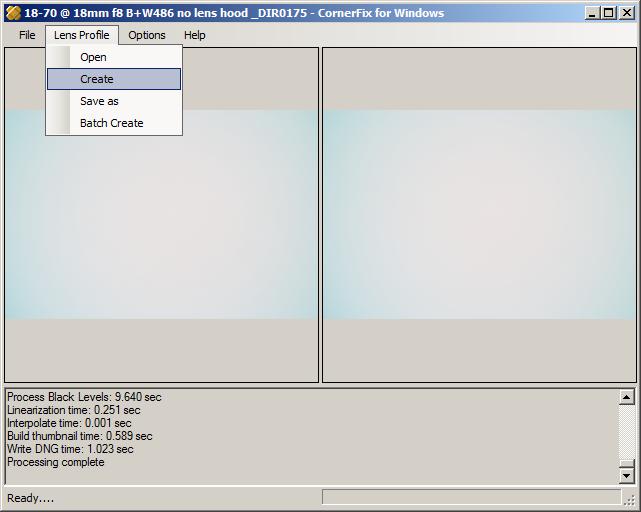
Use the Adobe DNG Converter to convert the reference photo to DNG format. Open CornerFix, and then choose File > Open Image and open your reference image DNG. When CornerFix has loaded your reference image, click Lens Profile > Create
After CornerFix has done its magic, go to Lens Profile > Save as and save your profile.
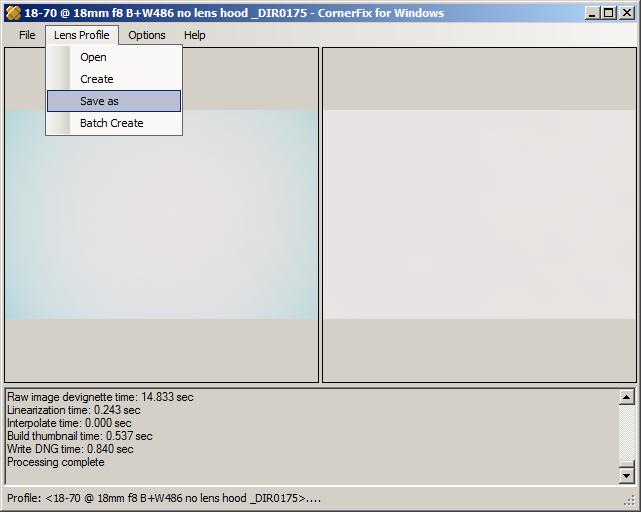
I used the lens and camera settings as the profile name to make it easy to load the correct profile I need when correcting images, e.g. 18-70 @ 18mm f8 B+W486 no lens hood.cpf
If you use a few different focal lengths that need fixing, you'll need to take a reference photo and create a different profile for each focal length / lens. CornerFix does have a batch create profile option that makes this a bit quicker.
Now you have Adobe DNG Converter and CornerFix set up, you 'need' to sort your photos taken with the B+W 486 UV-IR Cut filter and exhibiting the cyan vignetting into folders by lens and focal length. (You don't 'need' to, but I find it makes things easier). Then use the DNG Converter to convert each folder of images into DNGs.
Open CornerFix and in the menu click Lens Profile > Open and choose the relevant profile you created earlier. Then go to File > Batch Correct Images and select all the files in the folder containing images taken with the same settings as the profile you have loaded.
CornerFix will then process all those images, creating a new DNG for each one, but with _CF appended to the file name. You can then delete the original DNGs and process the CornerFix'd DNGs as usual in ACR or any other program that supports DNG format.
Visible vs. UV + Vis + IR vs. IR comparison
I did a quick comparison using the Fuji IS-Pro DSLR with the B+W 486 UV-IR Cut filter, without any filter, and with the Hitech 85 Infrared Filter. I also took a similar shot using my Nikon D200, but this was using a wider lens so the results aren't directly comparable, I include it below though. The below images have also had a bit of processing, mainly a curves adjustment to increase contrast.
D200, Tokina 10-17mm fisheye @ 17mm f/8

Fujifilm IS Pro, Nikon 18-70mm @ 18mm f/8 with B+W 486 UV-IR Cut filter
Fujifilm IS Pro, Nikon 18-70mm @ 18mm f/8 no filter
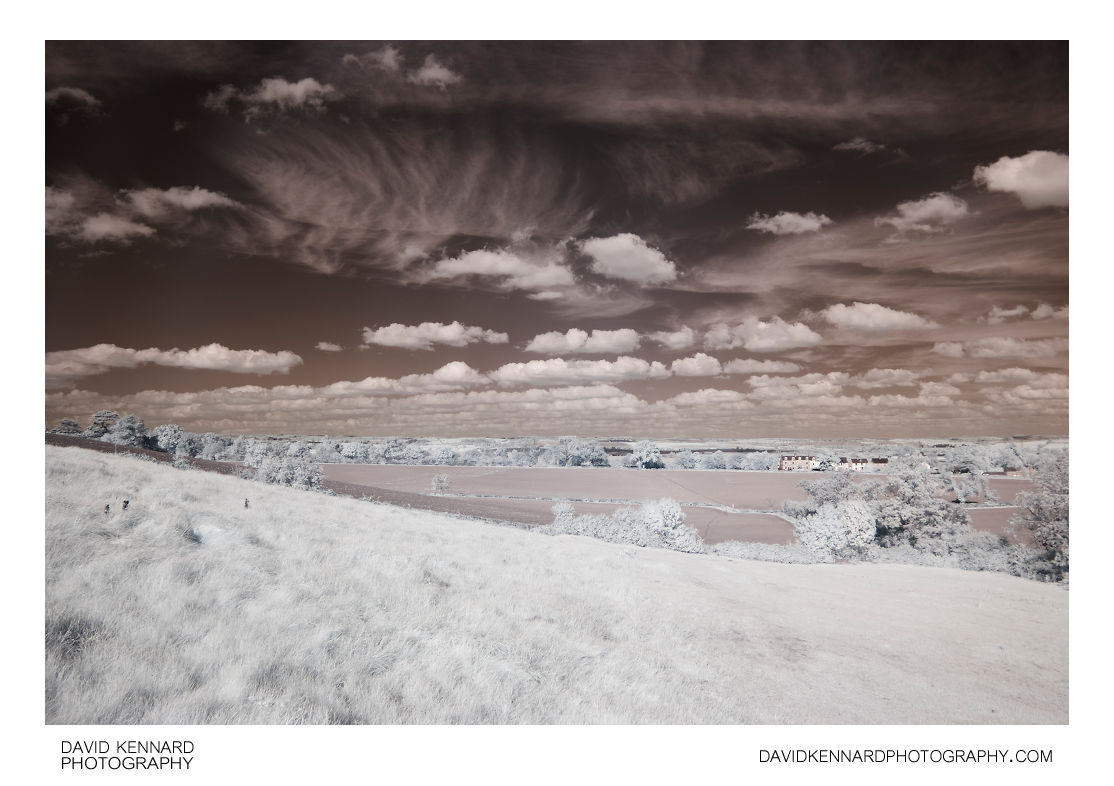
Fujifilm IS Pro, Nikon 18-70mm @ 18mm f/8 with Hitech 85 Infrared filter
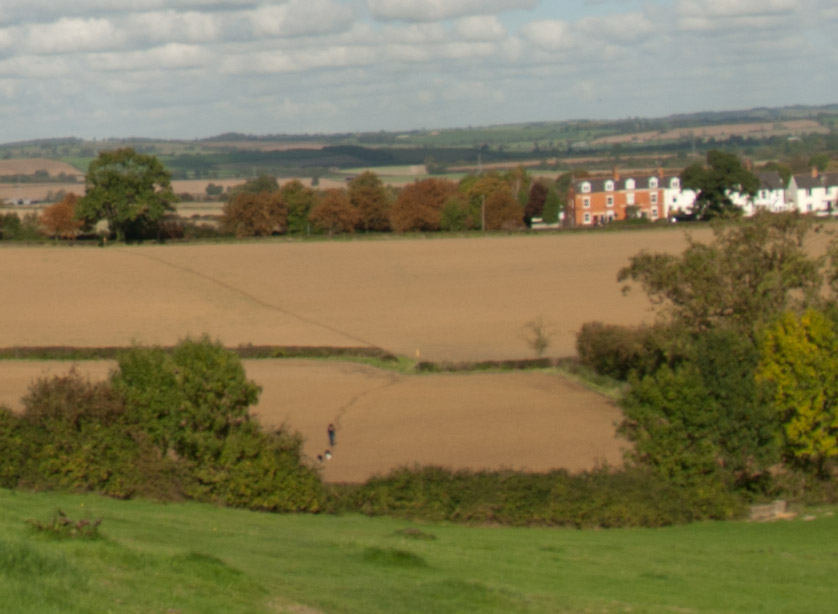
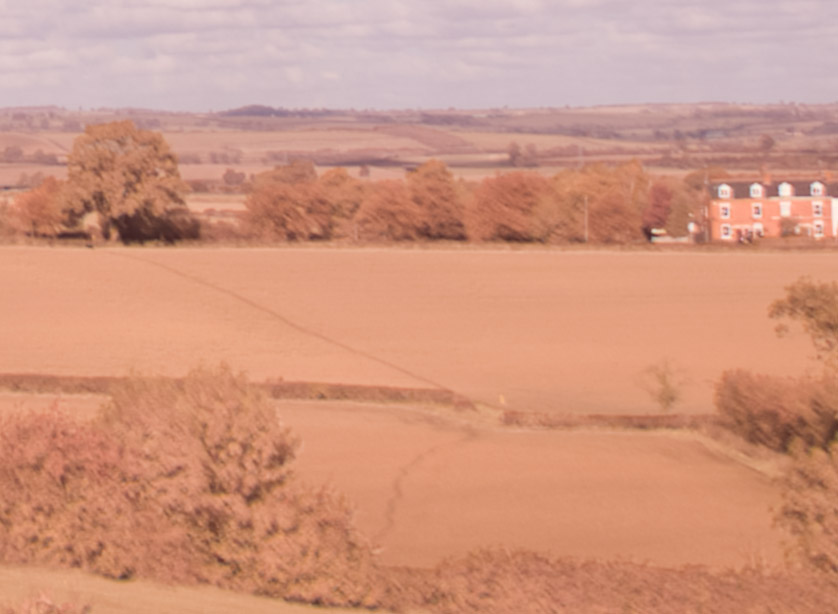
Crops (no sharpening):
D200, Tokina 10-17mm fisheye @ 17mm f/8
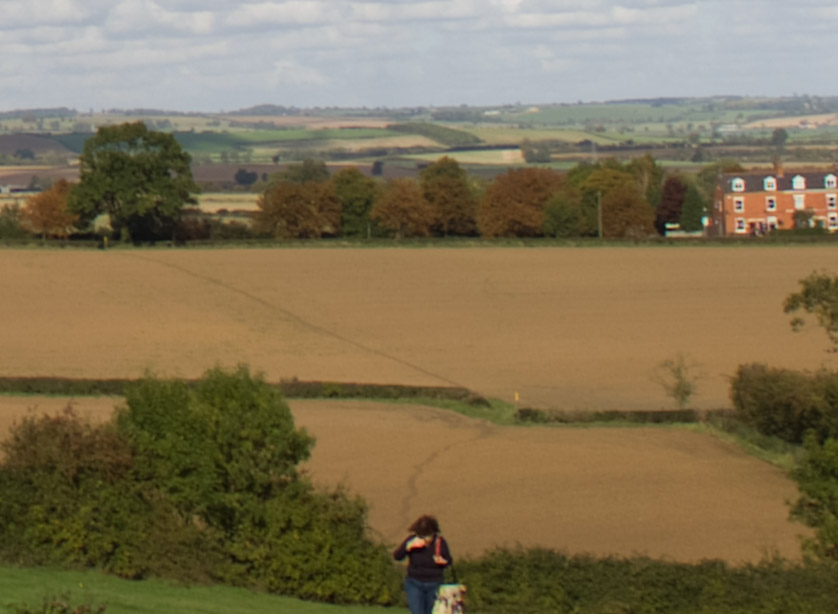
Fujifilm IS Pro, Nikon 18-70mm @ 18mm f/8 with B+W 486 UV-IR Cut filter
Fujifilm IS Pro, Nikon 18-70mm @ 18mm f/8 no filter

Fujifilm IS Pro, Nikon 18-70mm @ 18mm f/8 with Hitech 85 Infrared filter
You can see that there is a definite loss of sharpness in the Fuji IS Pro photo taken without any filtration, due to the different focus points of infrared and visible light.
I have read in a few places that the 6MP Fuji Super CCD sensor used in the IS Pro is roughly equivalent to a 8MP 'normal' Bayer sensor, and I would say this sounds about right looking at my unscientific tests. There certainly doesn't appear to be much loss of image data when comparing an interpolated 12MP image from the Fuji to a standard 10MP from my D200 anyway.
The Fuji has a definite advantage in dynamic range compared to the D200, I would say the IS-Pro probably has about 2-3 stops of highlight headroom whereas the D200 has about 1 stop (in the RAW files). Unfortunately, to make use of the Fuji's highlight headroom, it still requires merging multiple exposures in Photoshop, but you can generate the different exposures from one image and so not have to worry about moving people, cars, trees etc.
So far I have only been shooting RAW (RAF) with the IS Pro though, possibly when you shoot JPEG or TIFF the camera might manage the extra highlight data automatically to prevent blown highlights. I will try shooting RAW+JPEG next time I use the camera and see how it handles it.
i have a question,if i take some shots with my ir camera (with removed filter) ,can i then convert them to only visible light shots (normal photos ) as if they were taken using ir cut filter ?maybe by using photoshop ?
if yes will they be better or worse as results than the ones taken with the same camera and conditions but with an internal ir cut filter ?
Hi Sami
I don’t know of any way you could make a visible +IR photo look like a visible light only photo. I tried playing around with the channels in photoshop for a bit to see if your suggestion was feasible, but I couldn’t get anything like a normal photo out of the visible +IR photo. I think you would need an IR cut filter if you want to get normal photos out of your camera.
Dave
What if you shoot with a UV filter that will leave IR+visible? Or with a weak colored filter (they also cut off UV) to correct a possible color shift in the resulting IR-Vis photos?
I didn’t try that, but an IR+Visible photo would likely look nearly the same as an IR+UV+Visible photo. The IS Pro is much more sensitive to IR than it is to UV, so the UV makes little difference to the photos, while the IR makes a large difference. I’m 99% sure the reddish colour cast is caused by the IR sensitivity, so blocking UV wouldn’t make much difference. If I get a chance I’ll try taking a test photo with and without a UV filter just to make sure my assumptions are correct.
That doesn’t mean the camera’s useless for UV photography though – it is still much more sensitive to UV than a standard camera, but you need an expensive UV-pass filter and long shutter speeds or a UV flash from what I’ve read.
I’ve just ordered IS Pro that was on sale for a short time yesterday, have zero practical experience. Doing my backgroud reading and ordering some additional stuff for this coming weekend test drive. I am using UV-Vis-IR spectroscopy for my work (not related to photography). From that poit of viev, restricting the range of the wavelenghs reaching the sensor by putting a UV filter should decrease CA and decrease the blurr. Even more so with a color filter.
Since we are toking about artistic photography, any IR or “composite” IR+*** image is not true to life (also depends on the cutoff of commercial IR filters 850, 760, 720 etc). I am not sure what is the range/prices of avilable color filters in the digital age but I guess there should be a couple that could bring the color of the composite image closer to what we see. Not perfect but less PP for $10 worth of glass on the lens? Hope we’ll be able to compare the results of our trial next week!
Unrelated; have you tried to take night shots (let’s say under a steet lamp casring a cone of light or a building illuminated with spotlights) in composite mode? I’d like to add some IR to Vis w/o overpowering the Vis. If yes, with what settings and IR filters?
Hi Leo
I tried taking some shots with the IS-Pro using various filters on Friday, including some of buildings at night. I haven’t looked at the UV+Vis+IR vs Vis+IR photo in terms of CA and sharpness yet, but in terms of colour and exposure it looks virtually identical.
With the night shots I noticed that the full spectrum and IR only shots had a large amount of lens flare compared to Visible light only. Unfortunately I didn’t test Vis+IR (no UV) at night, so I will have to do that when I get a chance.
I’ll write up a quick blog post and post the example photos on the blog once I’ve looked at them more carefully.
Dave, my camera with 35mm f/1.8 lens is here but IR and IR/UV cut filters are still in transit. As expected, day shots w/o filters were on medium-rare side… Night shots of several neighbourhood Chrismas lights were all overblown with strong background. M.b. I went out too early, half an hour after sunset and there wasn’t enough temp difference between buildings, vegetation, lights and the camera body. The day was pretty warm, 15-20oC and the evening very mild. Sun-Tue is out because of the rain.
Think the best time would be on hot close to sunse t or 1-2h after with a narrow window of opportunity when the Vis light is dying and hot rocks/pavement/buildings emit IR. During this time UV will be non-existent, not sure about a right combination of IR and Vis filters.
Found thransmittance curves for commercial Vis filters: http://www.schneideroptics.com/pdfs/filters/FilterTransmissionCurves.pdf
Will keep practicing during late fall/winter. Waiting for final results of your research!
Hi Leo
I finally wrote up my findings: Use of filters for full spectrum and infrared photography with the Fuji IS-Pro, Full spectrum, Infrared, and visible light photography at night with the Fuji IS-Pro, and Fuji IS-Pro white balance settings and ACR.
In short, I found the UV filter didn’t make any difference at all. Shooting at night resulted in a lot of lens flare from lights, so I will prefer to use one of my ‘normal’ cameras for that.
Dave, have you tried this: IR Photography using a Hoya R72 Filter. It is a 2 photo process. I take a B&W IR Photo and a Color IR Photo and layer them in Photoshop and then process them to create this effect. © RMStringer Photography
https://www.flickr.com/photos/rmstringer/5027716212/in/set-72157610807175317
Nice work Leo, I’d be interested in how you’re layering them, something like soft light blend mode with a selective mask?
1. That wasn’t me :-((( My guess he takes 2 conseq. shots with and w/o the filter, align and blend untill the result looks good.
2. Didn’t have time to play with different IRs, tried only 720nm. Pretty decent sharpness handheld. My main concern now is UV-IR cutoff (wanted a nikon mount camera as addition to my Pentax K). On a sunny day with B+W filter colors were good, WB a bit off but nothing major, mostly yellowish grass. Unfortunately all pics looked a bit unsharp, even at f8 with 35mm f1.8 lens. Either the filters throw off the AF or I am too used to 16MP K-5… In case I decide to return it, I’ll keep experimenting with K-5. My only 52mm threaded lens is 18-55mm kit that focused well with 720nm IR and exposures weren’t too long.
Ah, okay. I’ve not tried it, but I don’t think you would need to take two photos for that effect as a B&W photo is the same as a colour photo converted to B&W. So you can just take one shot, convert it once in colour and once in B&W, then blend together in PS. If you took two shots you’d have problems with foliage blowing in the wind between the shots, though I guess that could give the image a more ethereal effect.
I think the IS-Pro is equivalent to about 8MP, so it would capture quite a bit less detail than your Pentax. I posted a RAW file using the UVIR-cut filter on the blog, so you can always download that and see how it compares to shots from your camera if you want. I always convert the RAWs at 12MP size in Adobe Camera RAW.
An interesting IR-related link:
http://photographic-central.blogspot.com/2012/01/panasonic-lumix-dmc-l1-still-real-gem.html
Have you attempted to use astronomical UV/IR cut filters like the IDAS (http://www.sciencecenter.net/hutech/idas/uibar.htm) or Baader (http://www.alpineastro.com/filters/uv_ir_cut_specs.htm)?
Do they also exhibit green-cyan vignetting?
I recently purchased a (probably one of the last new-in-box) IS-Pro for primarily for astrophotography but I’m interested in using it during the day also.
Hi Dana
The B+W filter is the only one I’ve tried. My guess is that astronomical filters would have the same cyan vignetting as the B+W filter when used on wide angle lenses.
Dave
They do. I’ve since tried a Hutech IDAS LP4 light pollution filter (48mm meant to go on the back of a telescope) and it has wonderful rainbow vignetting.
Thanks for sharing this. CornerFix was able to correct for pronounced cyan-green vignetting from Voigtländer Color-Skopar 21mm f/3.5 on Sigma FP. (I don’t use IR filters, I think vignetting is native to the lens and could have been exacerbated by cheap-ish CPL filter and/or Leica M-L mount adapter.)
RawTherapee produced terrible results with my flat field shot, yet with the same flat CornerFix produced great results and I could take the resulting DNG to develop further in RawTherapee.